This tutorial will teach you how to make DIY bangle bracelets using your favorite paint, paper, and Mod Podge. So cute and easy!
Are you a bracelet kind of gal? I definitely am. Remember the time that I decorated these wood bangle bracelets? You may or may not be excited to know that I’m at it again with the Mod Podge jewelry.
But I hope excited.
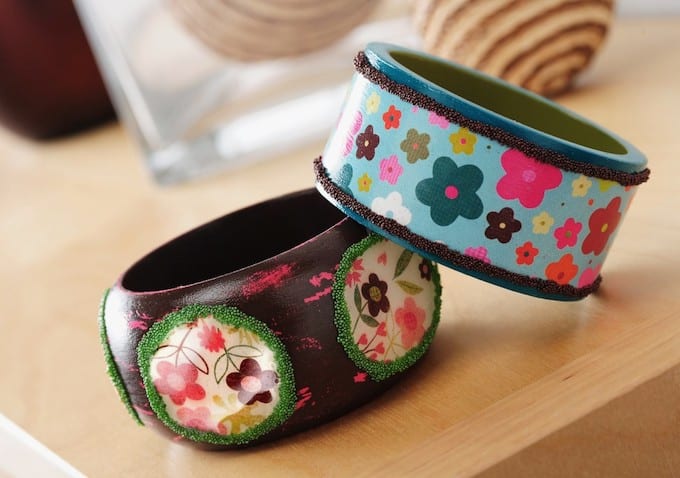
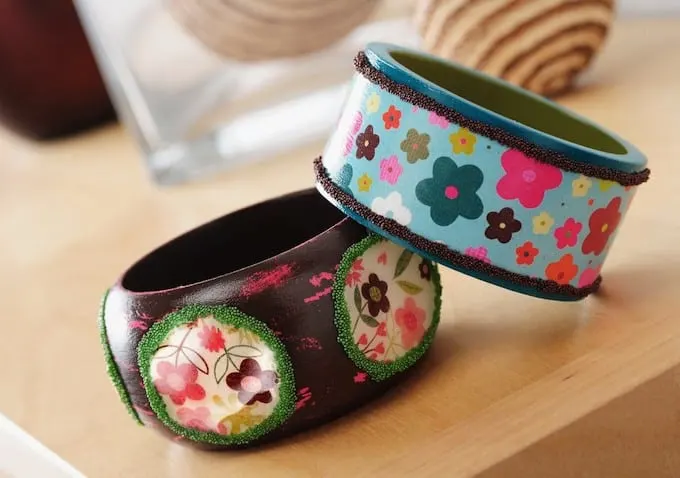
I went with a bit of a different color palette this time, but I still used the Dimensional Magic and the microbeads. These DIY bracelets are so bright and fun – and I can take them into fall. Here’s how to make them!
DIY Bangle Bracelets
Gather These Supplies
For both bangles:
- DIY Bangles – the blue floral bangle is the flat exterior and the brown bangle with green beads is the pentagon
- Gloss Mod Podge
- Scissors or Craft knife and mat
- Pencil
- Craft glue
- Paintbrush
Blue Floral Bangle with Beads
- FolkArt Acrylic paint – Forest Moss, Teal
- Paper scraps – K and Company
- Martha Stewart Microbeads in Brownstone – or fine glitter
Brown Distressed Bangle with Beads
- FolkArt Acrylic paint – Hot Pink, Real Brown
- Dimensional Magic
- Paper scraps – Basic Grey
- Martha Stewart Microbeads in Peridot – or fine glitter
- Tissue paper or vellum
- Tape
- Candle
- Sandpaper
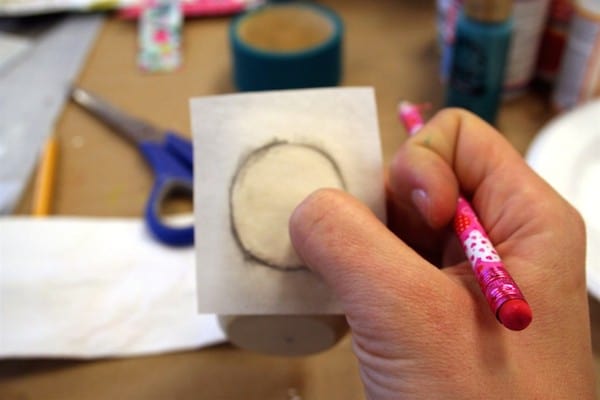

You need to do some preparation for the pentagon bangle, since you have five flat areas to cover with paper.
Using a vellum scrap and a pencil, I rubbed around the edge of the shape to make a template for cutting paper – kind of like pencil rubbings you did when you were little.
Do you only do one? No – I recommend doing all five sides and then numbering. I like my paper shapes to fit exactly.
Tape the vellum down to your sheet of scrapbook paper and then cut out the five separate shapes. The way I kept track is with numbering.
If you write a number onto the bangle and onto the back of the scrapbook paper, you’ll never see it; it will be Mod Podged down.
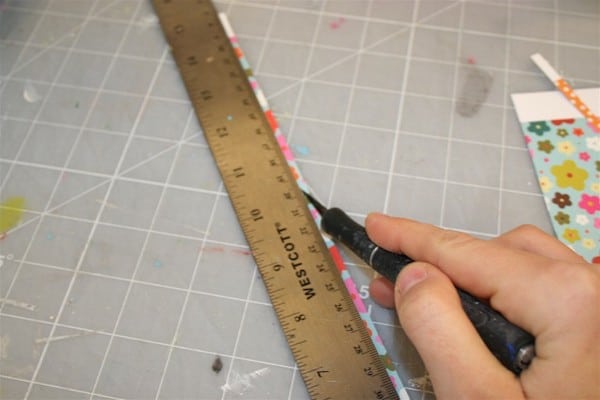

Cut paper to fit your flat bangle as well. Set all the paper aside.
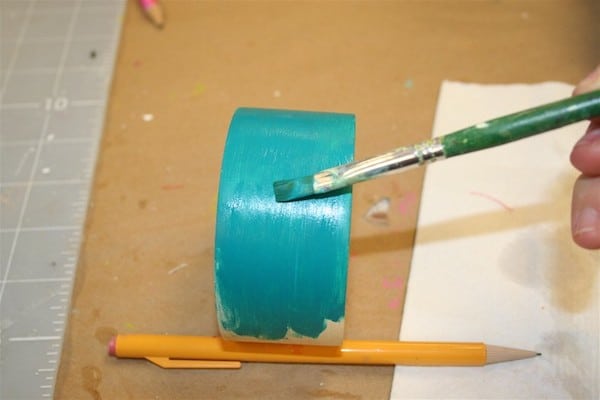
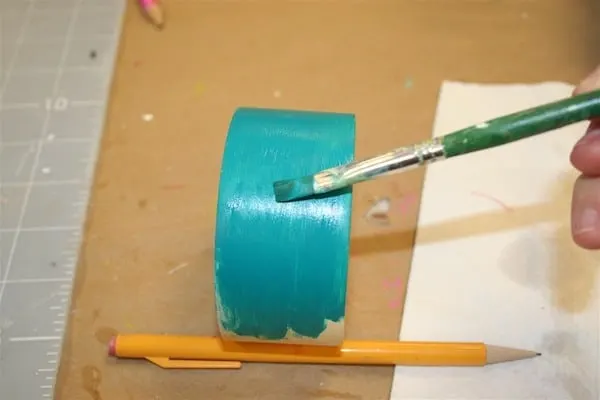

Basecoat your bangles according to the colors listed in the instructions. For the blue floral bangle I used Teal as the base color and then Forest Moss for the inside.
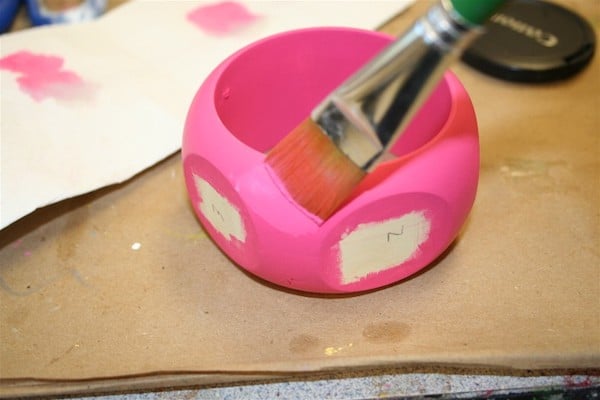
I painted the brown bangle with a layer of Hot Pink to start. Give at least two coats and allow to dry.

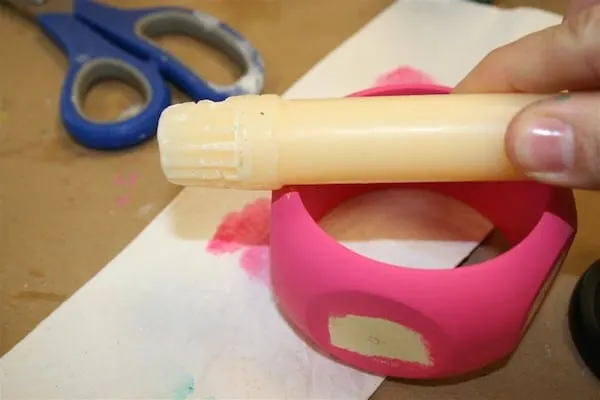
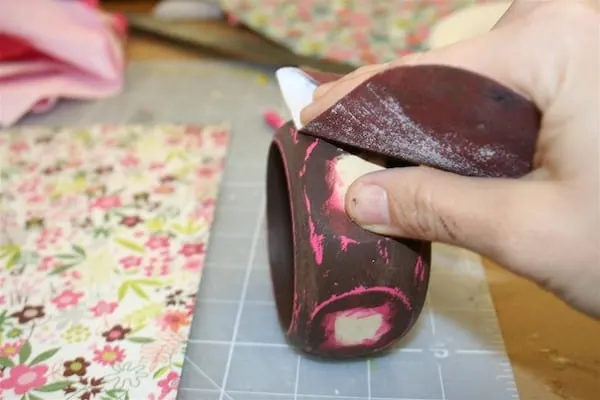
The brown bangle is distressed. You can distress easily by rubbing a wax candle all over the bangle, especially on the ridges.
Rub firmly and then brush off any extra wax chunks that are left. Remember that the more wax you add, the more distressed the bracelet will be.

Paint your second color directly over the wax and the first color. Paint until the first coat is completely covered and allow to dry.
Rub a piece of medium grit sandpaper over the top of the bangle – you’ll see the areas where the wax is just rub away (quite easily), and you can see the first layer color beneath. Sand more for more distressing.
Add the paper pieces to your distressed bangle with Mod Podge (also Mod Podge the paper onto the blue floral bangle). Allow to dry for 15 – 20 minutes, then give them a top coat. Add a few coats of Mod Podge to seal the bangles.
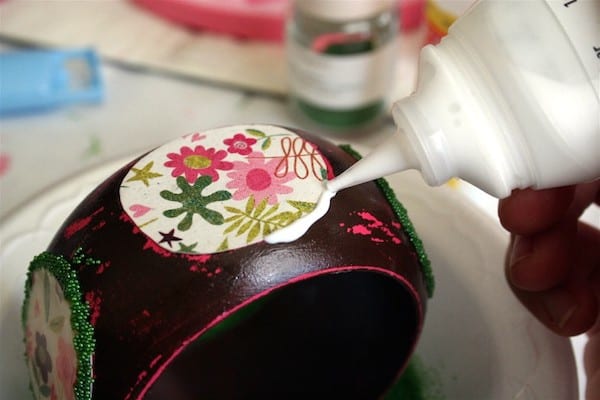
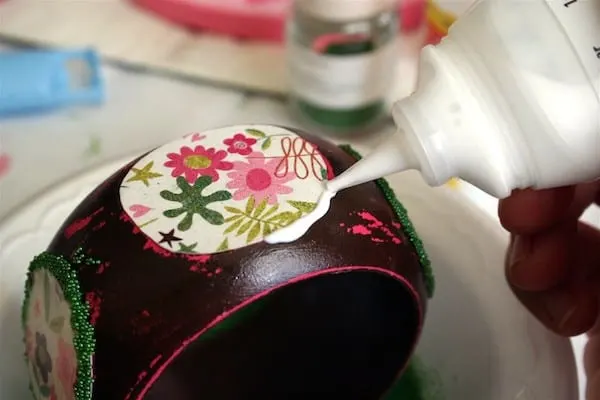
Time to add the beads. To do this, paint Mod Podge around the edge of your paper and sprinkle the beads onto it. You’ll see here that I used Mod Podge in an old Dimensional Magic bottle so that I could get more control (I have a very shaky hand).
If you don’t have an old bottle, use a smaller paintbrush and drag the Mod Podge around the edge.
Sprinkle the microbeads on, allow to dry and then rotate and repeat. When dry, your blue floral bangle is finished! You still have one more step on the brown distressed bangle.
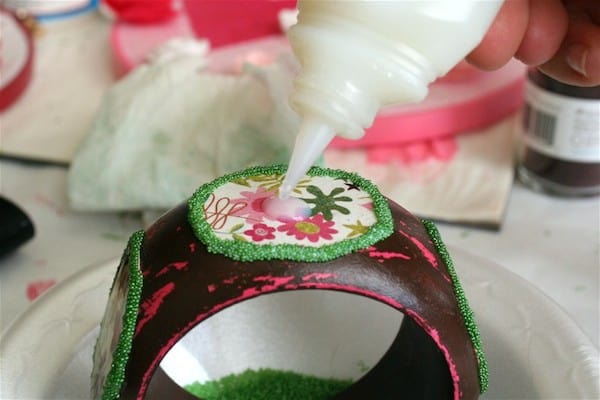
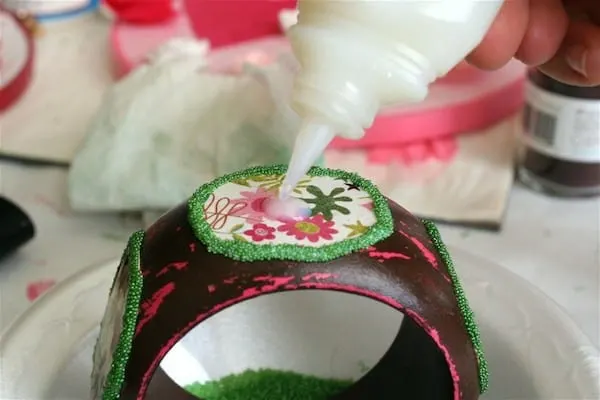
Once the beads are completely dry, add Mod Podge Dimensional Magic to the oval part of the bangle, right on top of the paper. Unfortunately this is a slow process, but only because of dry time.
The good thing is that you can add the Dimensional Magic and leave it to dry (DM side up). Come back later and then rotate the bangle, add more DM.
Total application time is about 15 minutes, but total dry time means this project is at least going to take overnight. Once the Dimensional Magic is dry, your bangle is done.
What do you think about my DIY bangle bracelets, and how would you decorate yours? Let me know in the comments! Please also check out these other bracelets:
Morena Hockley
Friday 3rd of August 2012
I just won some unfinished bangle bracelets in a giveaway and was stumped as to what to do with them. I love this idea AND I have all the supplies. Thanks for the inspiration!
Jennifer fay
Wednesday 1st of August 2012
love those. I am so into making bracelets of all sorts this year. Knitted, fabric, yo yo bracelets, beaded ones etc.... I hope I sell some at the fall craft show or else I'm stuck with them all!
Shannon at Fox Hollow Cottage
Wednesday 1st of August 2012
That dimensional magic stuff is so COOL! Love the chocolate one :)