
Make a stylish, modern wood Christmas centerpiece for your holiday decor! This DIY is simple to do with no power tools involved. Looks great on a dinner table or mantel.
Skills Required: Beginner to Advanced Beginner. You will be using a box cutter to trim your MDF to size and Mod Podge to decorate with.
As the holiday season rolls around, the quest for the perfect Christmas decor becomes a creative journey for many. In the spirit of crafting and festive decoration, I’m excited to bring you a tutorial that combines the warmth of traditional holiday themes with a modern twist.
Today, we’re going to embark on a DIY adventure to create a wood Christmas centerpiece that promises to be the talking point of your holiday decor.
The best part? It’s a project that’s as friendly to beginners as it is to intermediate crafters, proving that elegance and simplicity can indeed go hand in hand.
This isn’t just any decoration; it’s a modern take on Christmas trees, crafted from MDF and brought to life with the magic of Mod Podge.
And for those of you who might feel a tad intimidated by power tools or simply don’t have them at your disposal, I’ve got your back. This project is designed with you in mind, requiring only a box cutter and your enthusiasm for DIY projects.
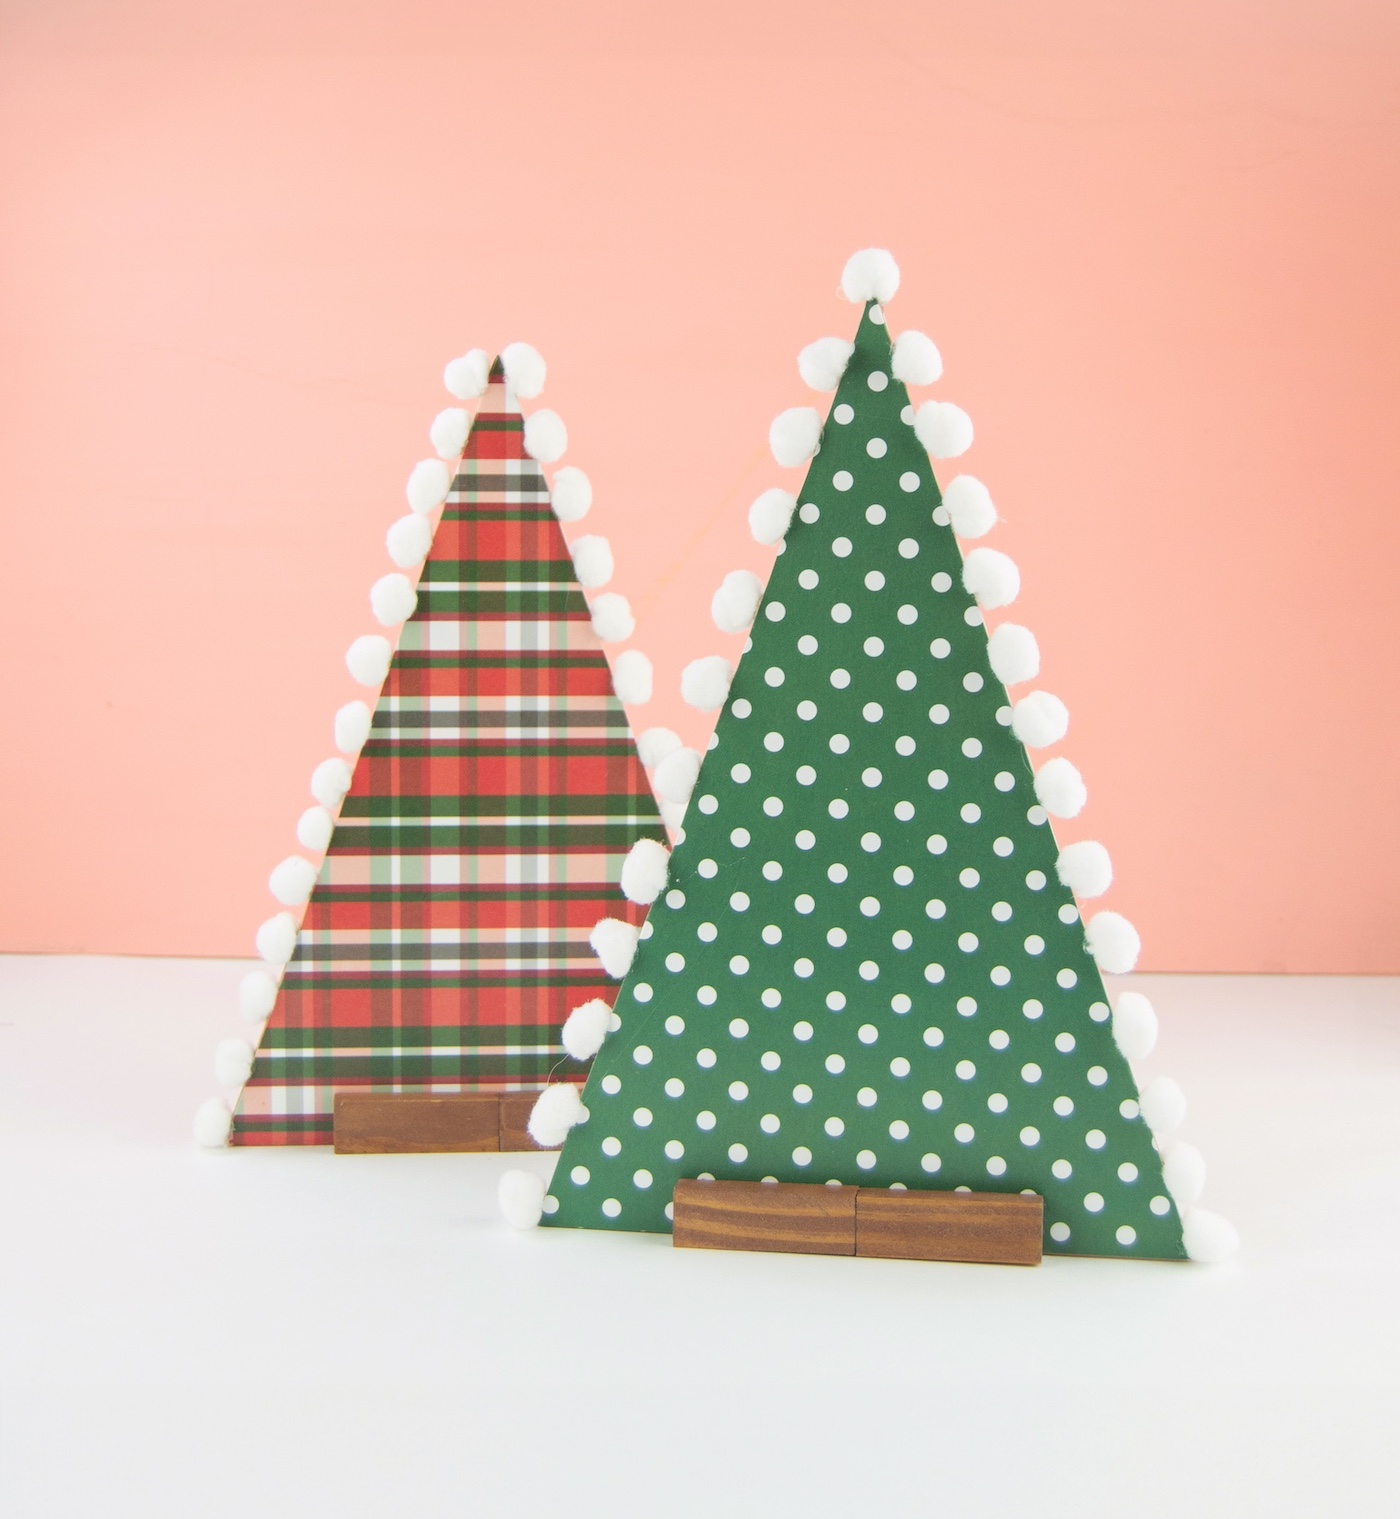
What really sets this Christmas craft apart is the opportunity for personalization. Whether you choose vibrant cardstock to make your trees pop or prefer a more subtle elegant or neutral paper, the choice is yours.
And if you want to add a whimsical touch, why not consider adding pom-pom trim to the edges of your trees? You’ll see how both options look in this post.
So grab your supplies and let’s create a wood Christmas centerpiece that will not only add a unique charm to your holiday decor, but also be a fun activity for the season.

Whether you’re crafting alone or making it a family activity, this modern interpretation of Christmas trees is sure to spread joy and festivity throughout your home. Let’s get started and make this holiday season one to remember, with a centerpiece that’s truly one of a kind!
Here’s what you’re going to need.
Gather These Supplies
- 1/8” MDF board
- Paper tree template – optional, or paper to make your own
- Christmas cardstock
- Mod Podge Gloss
- Jenga blocks – Dollar Tree, or other small wood blocks
- Acrylic paint – brown
- Hot glue gun and glue sticks
- Cutting mat
- Steel rule
- Box cutter
- Paintbrush
- Pencil
Tips and Thoughts for This Project
You will have to make more than 10 passes to fully cut through the MDF board, but it’s great if you don’t want to use or do not have power tools. If you are comfortable using power tools, you can use a jigsaw or circular saw to cut it to size.
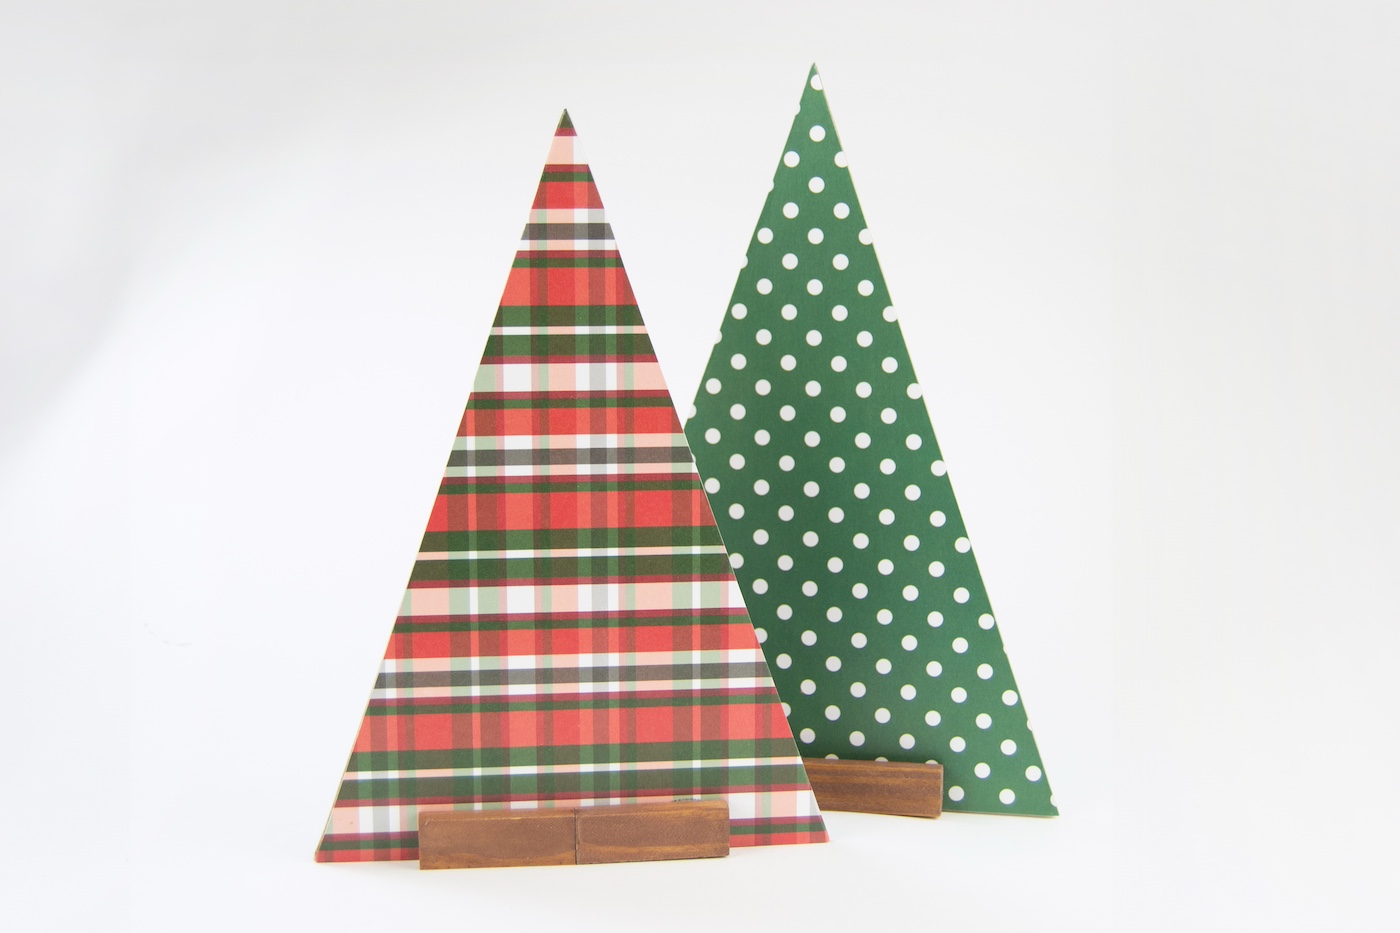
With a square MDF shape, I was able to cut two trees – one bigger and one smaller.
Stain or paint the base, or skip this step altogether if you want an unfinished wood base. It’s easy to turn brown paint into a stain. Just add a little bit to a container and add water; stir and test until you reach the desired level of saturation.
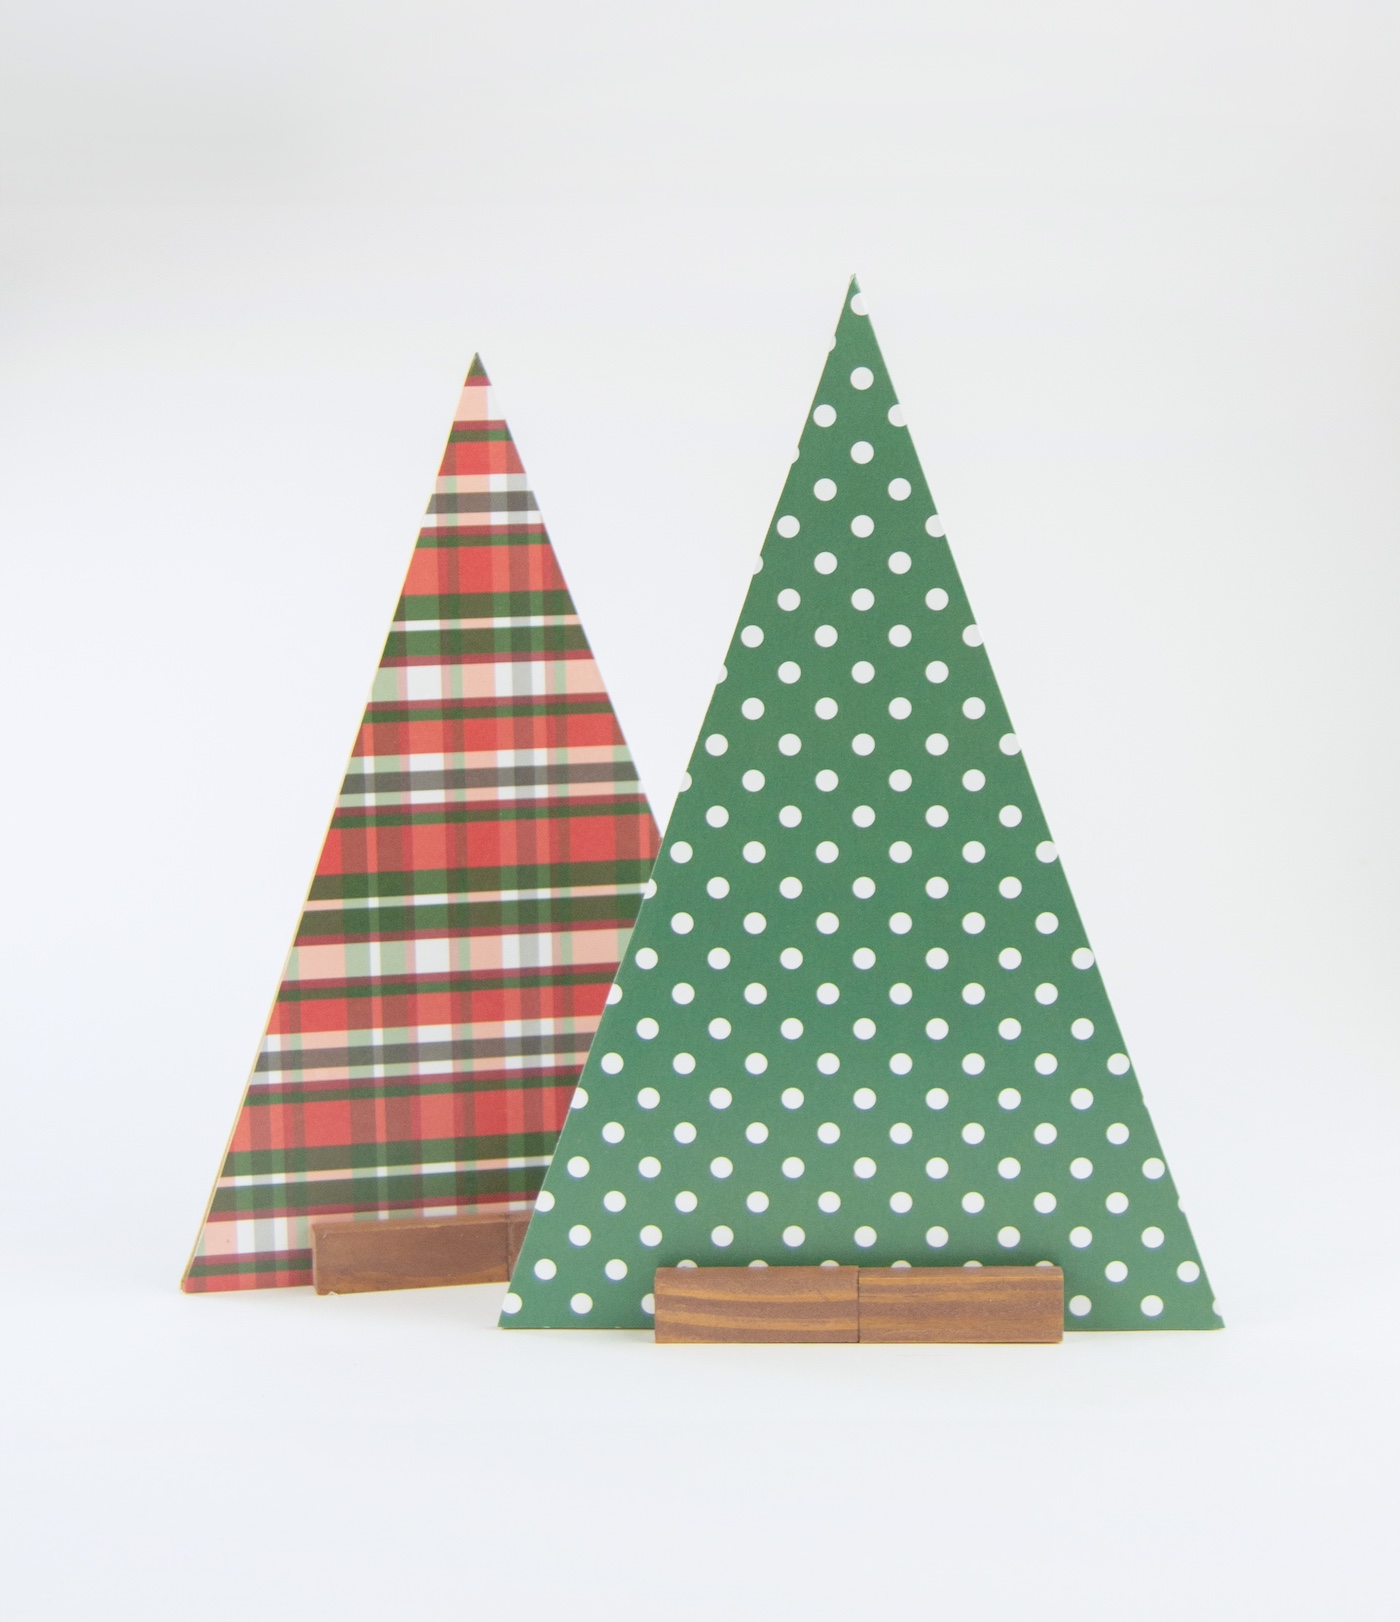
I love how this was really easy to make, and didn’t need any power tools. Which one do you like, the one with or the one without the pom poms?
PS- we did some Christmas trees with napkins . . . you have to see those too! Get the how to card for this project below:

Wooden Christmas Trees
Equipment
- Cutting mat
- Steel ruler
- Box cutter
Materials
- 1 piece 1/8” MDF board
- Paper tree template or paper to make your own
- Christmas cardstock
- Mod Podge Gloss
- Jenga blocks – Dollar Tree or other small wood blocks
- Acrylic paint brown
Instructions
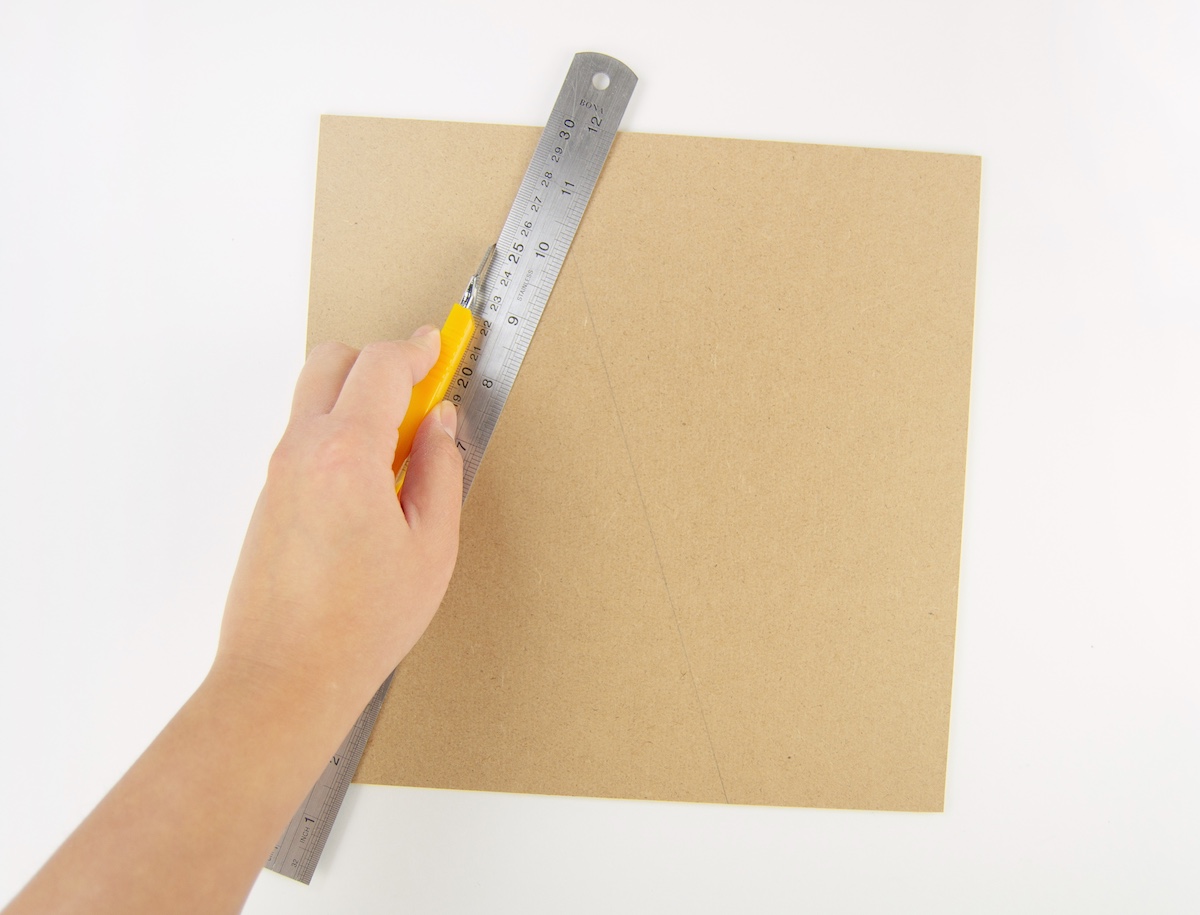
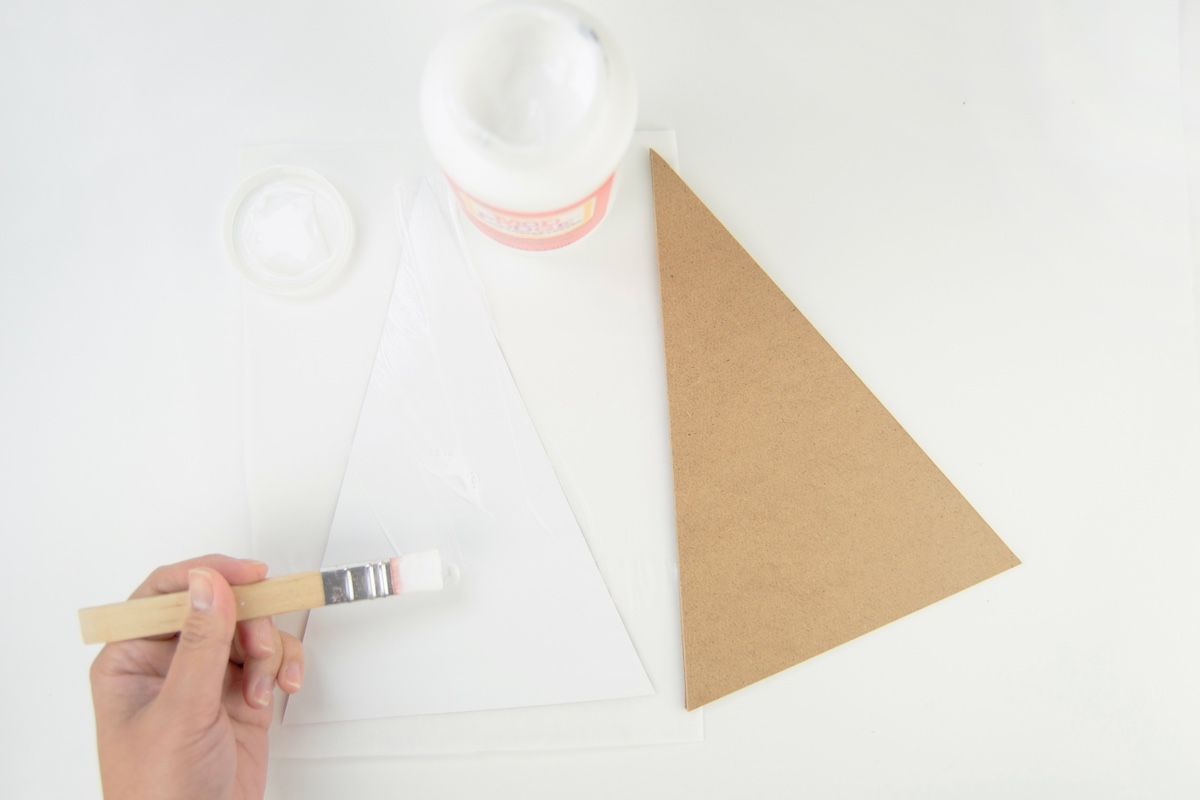
- Create a template that you will use to cut your MDF. I folded white paper in half lengthwise and cut a triangle shape with my box cutter. You can also use the provided template.

- Unfold the paper template and then trace it on the MDF board with a pencil.

- Cut your MDF board. Using a box cutter (with a sharp blade) and a steel rule, cut your MDF piece.
- Use the cut MDF tree as a template for the cardstock of your choice.

- Cut the cardstock to size. Make sure to cut two pieces – one for the front and backside of the MDF tree shape.

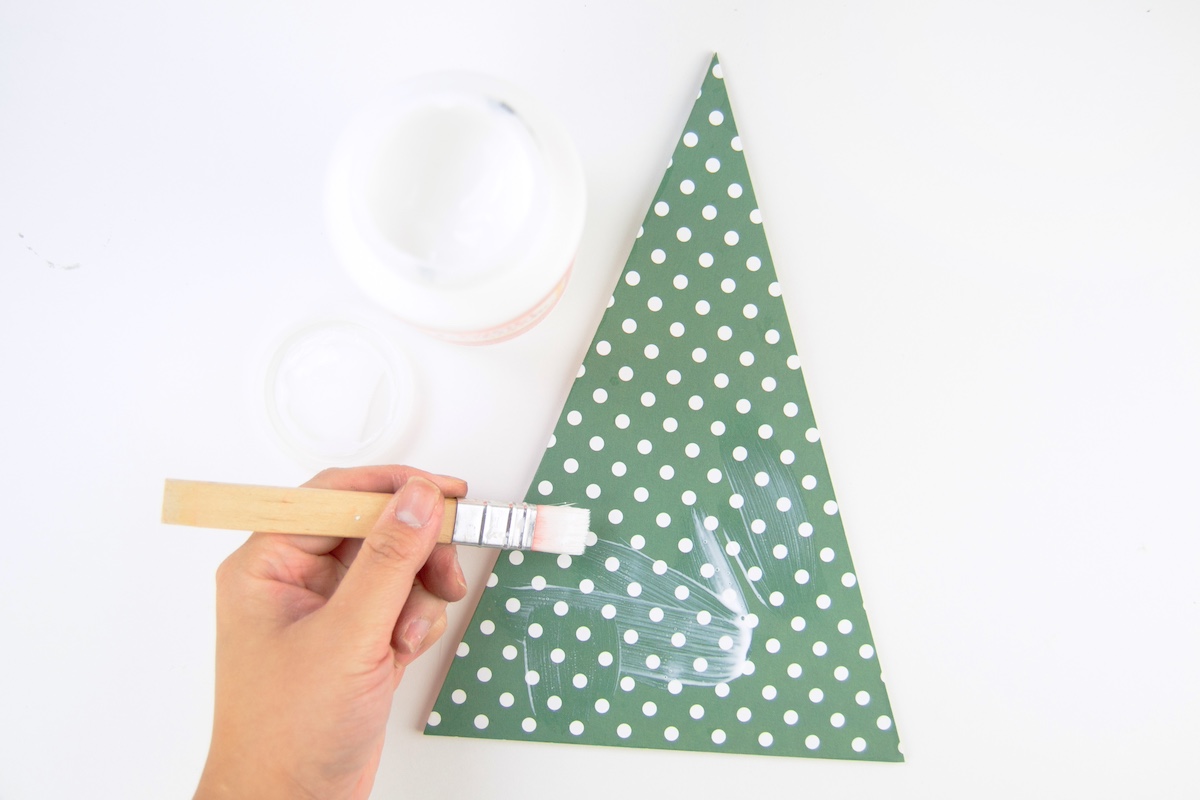
- Use Mod Podge to decoupage the cardstock onto the MDF shape. Apply the Mod Podge onto the cardstock (not the MDF, as it would just absorb the Mod Podge very quickly) before centering and adhering it onto the MDF shape. Repeat with the other side and leave it to dry.
- Apply a few coats of Mod Podge to protect the cardstock from wear. Let that dry and repeat the process on the other side.
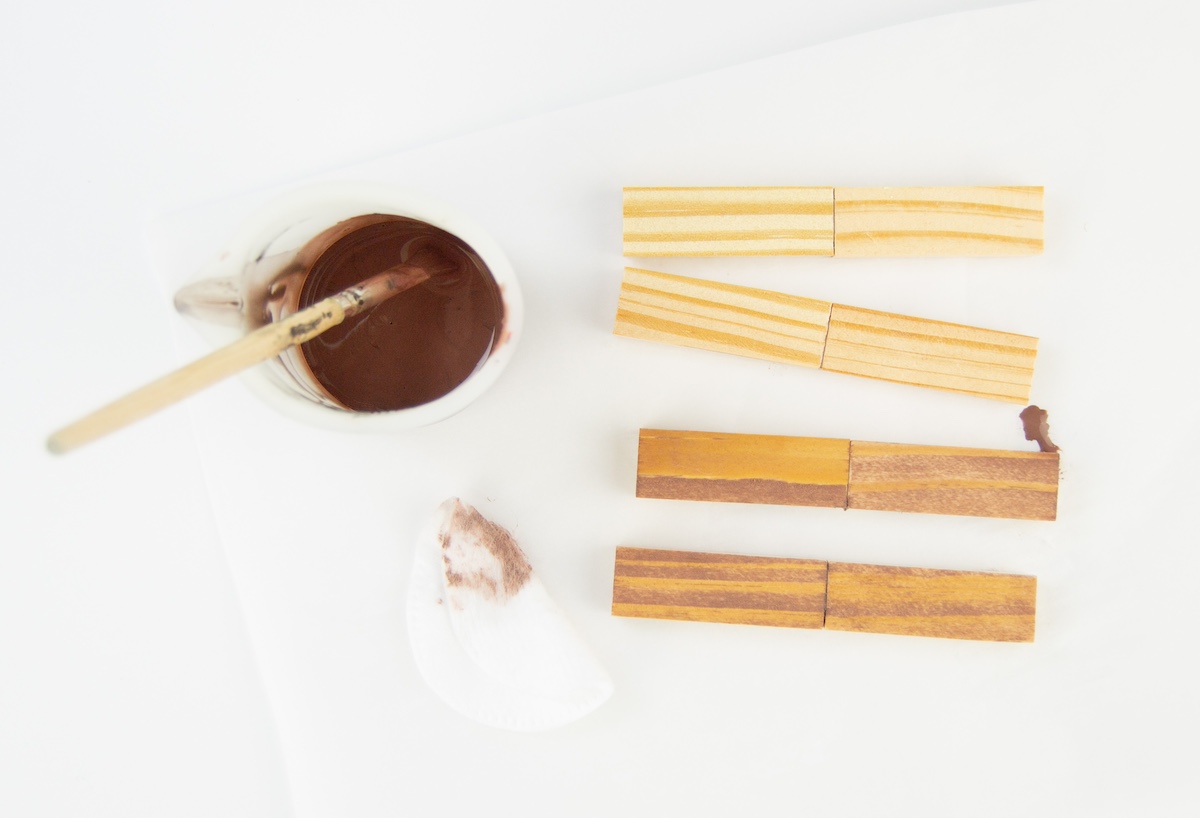
- Use wood blocks for the base of your tree to stand. I used tower block pieces from the dollar store – glue two together using hot glue to create a long piece. I made four pieces, two for each tree.

- Use watered down brown paint and brush it onto the wood base pieces to achieve a stained look. Coat with Mod Podge to seal the wood and give it a more finished look.
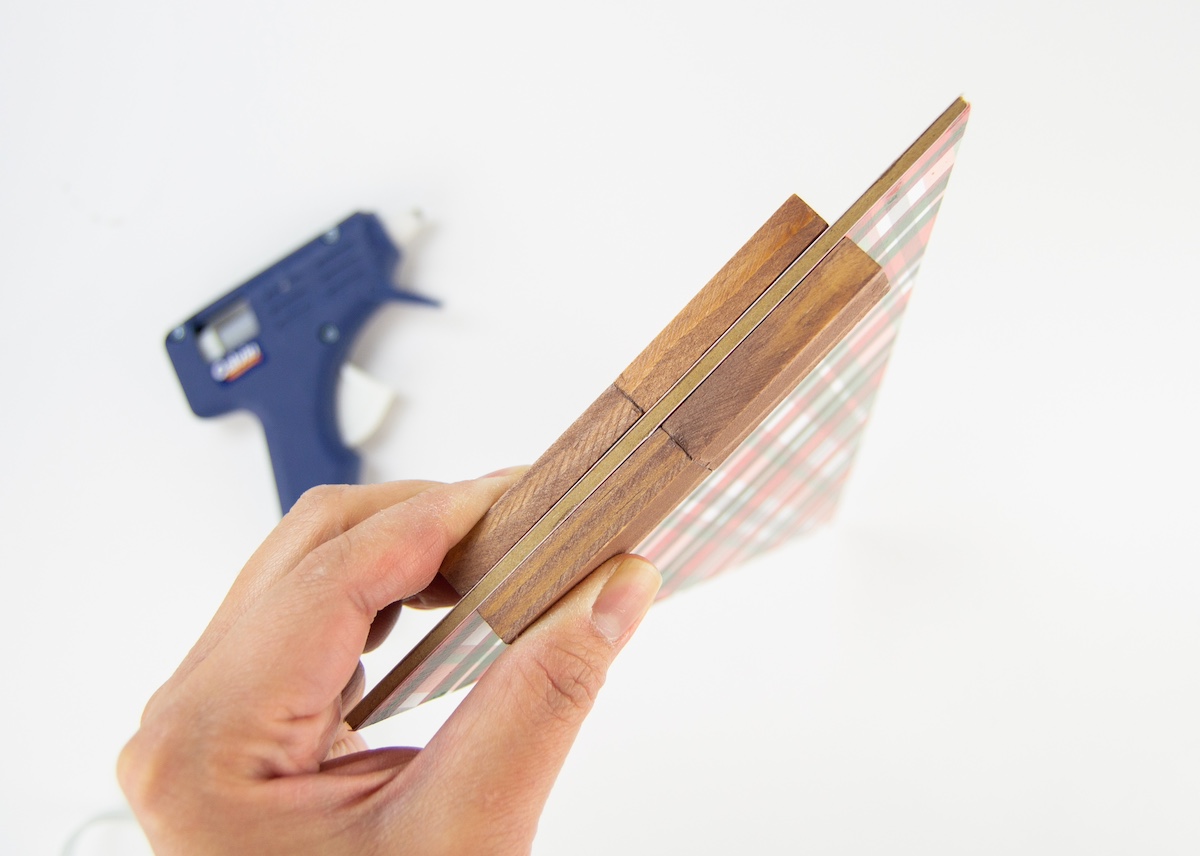
- Mark the center of the base of your tree, and use hot glue to attach the wood base – one on each side, centered – to your tree. Make sure they are aligned on the bottom so it stands without wobbling.
- Glue pom pom trim or small white pom poms onto the edge of the tree for a cute and fun feel.

Did you enjoy this cute holiday centerpiece idea? Let me know in the comments! I’d love for you to check out these other projects as well:
Believe Wood Star • Busted Canvas • Chalkboard Trees • Christmas Candles • Countdown Chalkboard • DIY Christmas Village • Fabric Christmas Bowl • Glitter Candle Holders • Farmhouse Sign • Frosted Mason Jar Luminaries • Gnome Wood Gift Tag • Hang Stockings Without a Mantel • Holiday Door Hangers • DIY Christmas Candle Holders • JOY Plaque • Merry Christmas Decor • Peace Wood Decor • Vintage Christmas Candles • Tree Mantel Decor • Wood Ornament Decor • Wood Trees with Book Pages • Yarn Wrapped Trees


I love how cute and simple it is.
It’s Me Again.. 🙂 I thought being your newest follower and all… You might want to see a project I did using The Dimensional Podge… Here’s the Link just in case you would like to take a peek…. 🙂
JUST came across your blog VIA the Polka Dot Closet… As I can see I am a Little late to the Party.. 🙂 Just became your newest follower…
Oh my this is perfect for my open shelves, love it!