
Learn how to make luminaries from galvanized tie plates. These DIY luminaries are durable, weather-resistant, and perfect for holiday decorating.
Desperately seeking a cool and functional lighting option for your space? Man Podger David has a new tutorial for you – make DIY luminaries with hardware store goodies! Most of you don’t know this, but I’m really into mood lighting.
I’m not a big fan of bright light. These give off a very subtle and pretty glow that isn’t overwhelming. I need to make about a hundred, because my friends would love them for gifts. Here’s the tutorial, straight from David.
Hi, David here.
If you’ve ever lined a walkway with paper luminarias on Christmas Eve, you know they’re beautiful . . . and also a little temporary. A gust of wind, a surprise rain shower, or a curious kid can turn your display into a project that needs constant attention.
That’s what inspired these DIY luminaries.
I wanted something that captured the warm charm of traditional white paper bag luminarias, but would last beyond a single evening. I also wanted a project that wouldn’t cost a fortune.
As usual, that sent me wandering through the hardware store looking for materials that were never intended to become home decor.
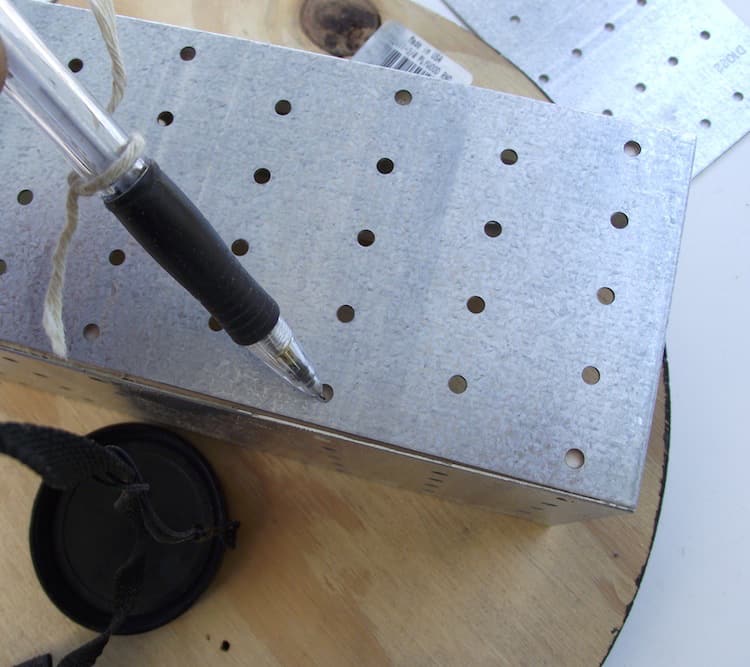
That’s when I found galvanized tie plates.
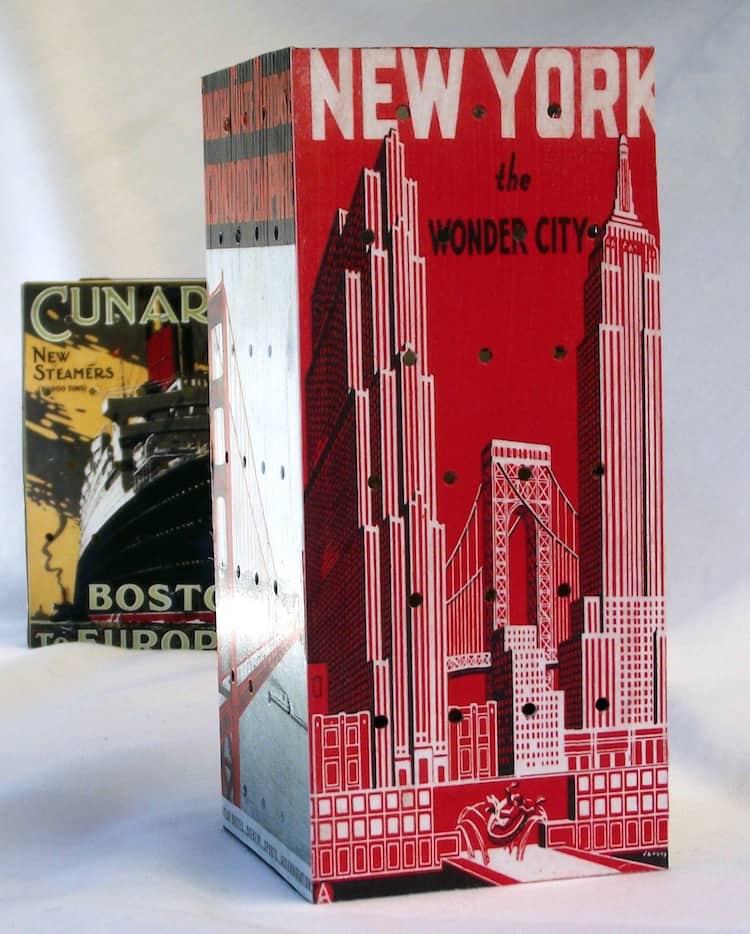
These metal plates are normally used for construction, but they have one feature that immediately caught my attention: holes. Lots of holes.
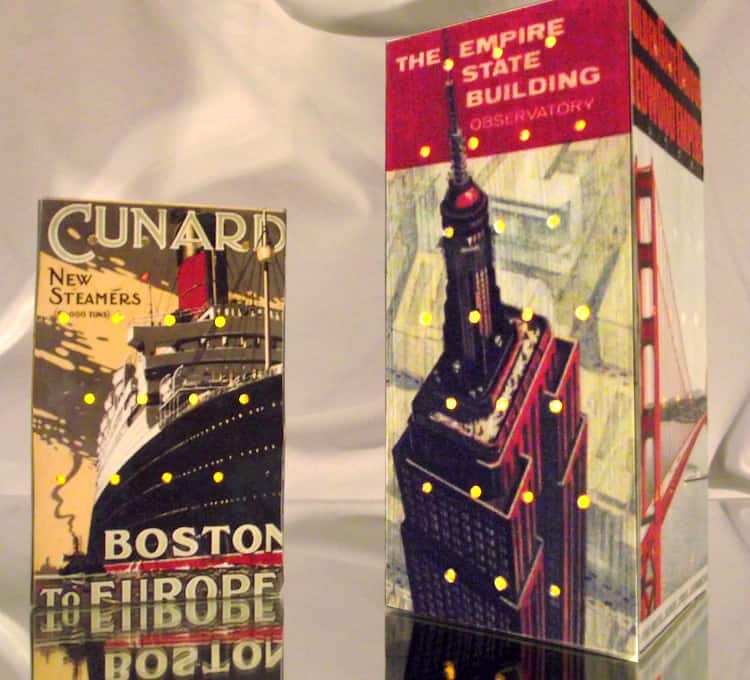
When a votive candle or battery-operated tea lights are placed inside, the light shines through the openings and creates a beautiful pattern on nearby surfaces.
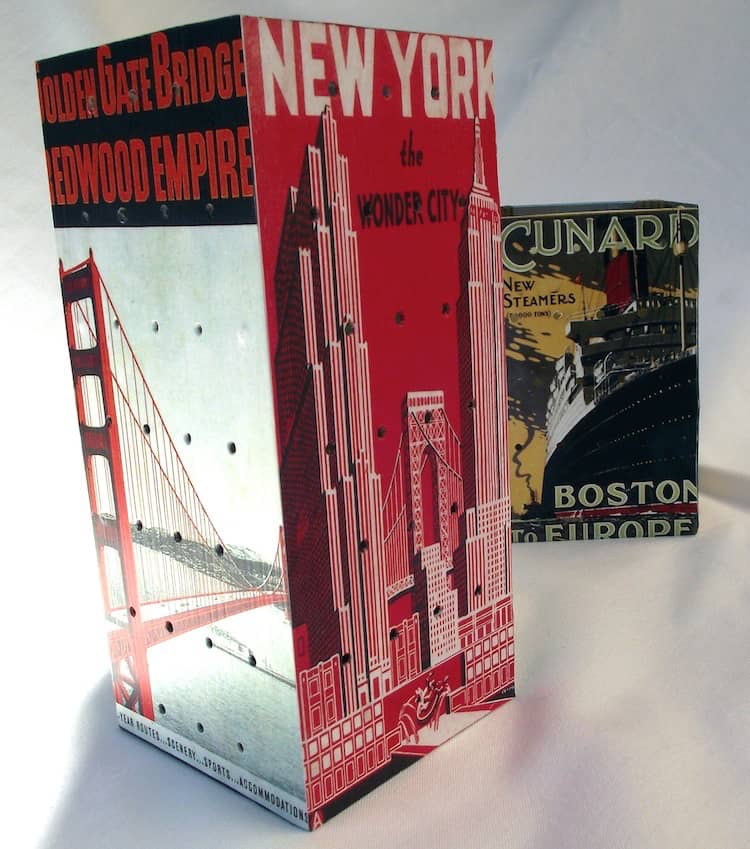
The result is a set of magical luminaries that look great on a walkway, along pathways, on a patio, or as a centerpiece. Unlike paper luminarias, these metal versions can handle winter weather and can be brought out year after year during December and the holiday season.
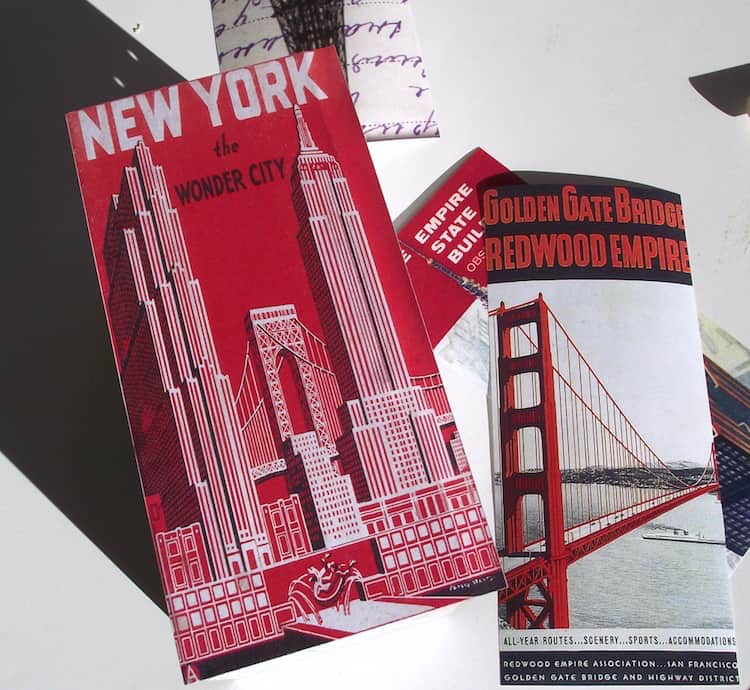
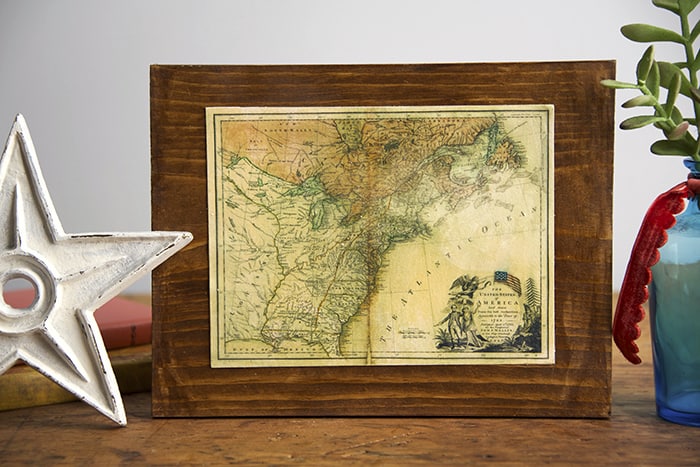
One of my favorite things about this project is how customizable it is. I used vintage travel images, but scrapbook paper, maps, sheet music, book pages, or family photos would work just as well. You can even make a themed luminaria for a wedding, birthday, or other special event.
These DIY luminaries also make great gifts. I know more than one guest who has asked how they were made after seeing them displayed around the neighborhood. In fact, I think they’d make a fun craft project for teens working alongside an adult.
If you’re looking for how to make luminaries that are sturdy, inexpensive, and unique, this project checks all the boxes. The finished little lantern gives off the golden glow of a candle while creating interesting patterns through the metal sides.
For safety, I recommend battery-operated tea lights instead of a real candle. You can also use fairy lights if you’d like a softer look. Either option works beautifully and makes these luminarias safe for indoor or outdoor decorating.
Whether you’re decorating for Christmas Eve, the festive season, or simply adding atmosphere to your home, these DIY luminaries are one of my favorite hardware-store transformations.
Why You’ll Love These DIY Luminaries
- Made from durable galvanized metal
- Reusable year after year
- Perfect for December decorating
- Budget-friendly materials
- Easy to customize
- Great for pathways and a walkway
- Suitable for indoor or outdoor displays
- Creates a beautiful pattern when illuminated
Are you ready to get started? The how to is below:

How to Make Luminaries
Equipment
- Clamp(s)
- Toothpick
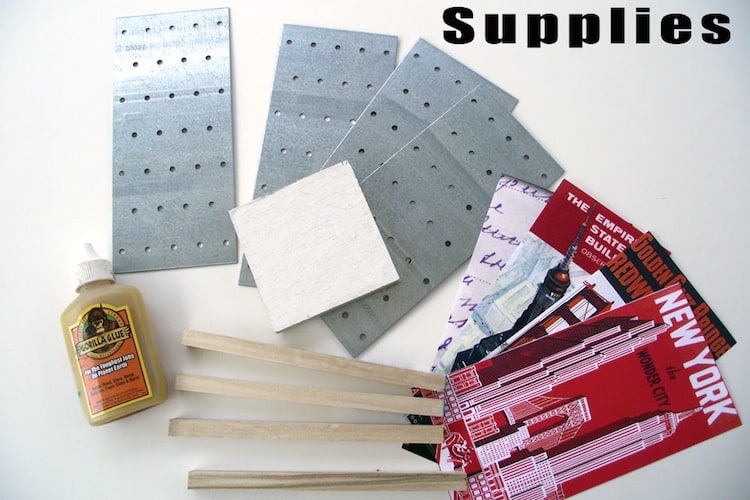
Materials
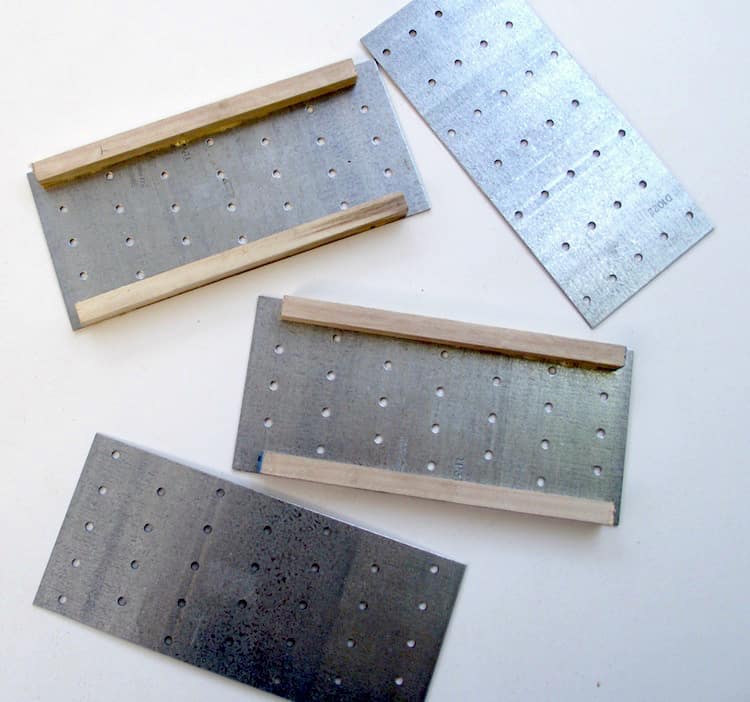
- 4 pieces tie plates galvanized, 3 1/8 x 7"
- 4 pieces square dowels cut to 6 1/4" length
- 1 piece scrap wood 3 1/8” x 3 1/16"
- Gorilla Glue
- Mod Podge Matte
- Paper
Instructions
- Cut a square wood base sized so the metal plates overlap neatly at the corners. For the 3 1/8" x 7" galvanized tie plates used here, cut the base approximately 3 1/8" square.
- You want the dowels to rest on the base but not stick out the top. Measure the height of the tie plates and subtract the thickness of the base. For 7-inch plates and a 1/2-inch base, cut the dowels to approximately 6 1/4 inches long so they sit flush inside the structure.
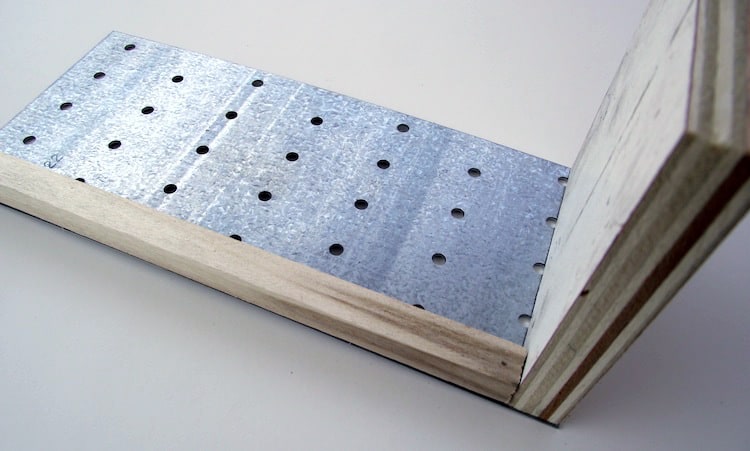
- Glue two dowels to one metal plate using Gorilla Glue, with the base as a guide so that the dowels are at the right height.Repeat with the second pair of dowels and another plate. Allow the glue to become slightly tacky before positioning the pieces.
- Glue the dowel-and-plate sections to the wood base.
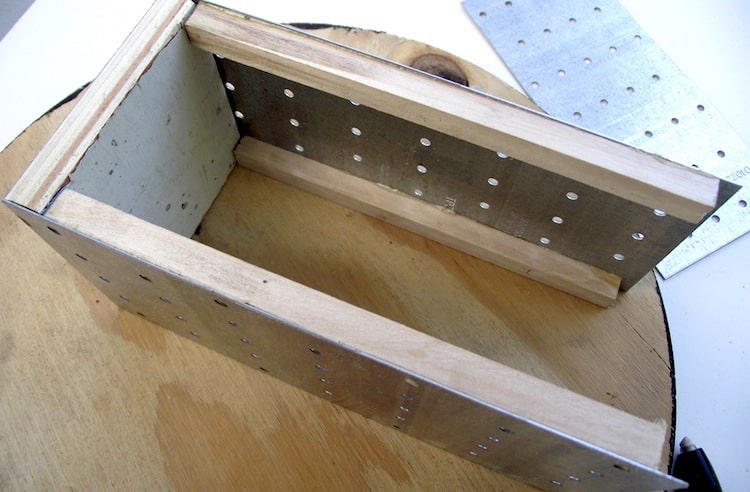
- Position the remaining tie plates on the open sides and mark where the holes align with the dowels.
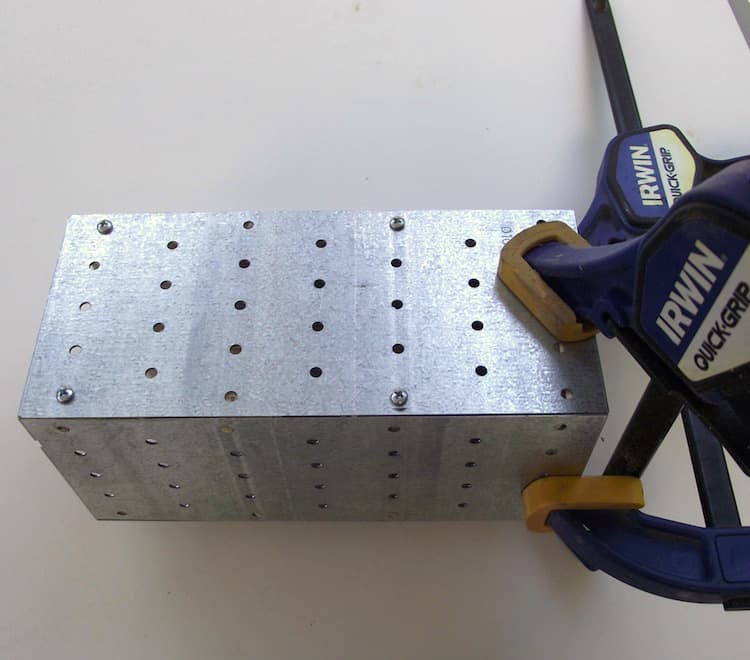
- If desired, drill pilot holes and temporarily secure the plates with small screws while the glue dries.

- Use clamps to hold everything in place until fully cured.
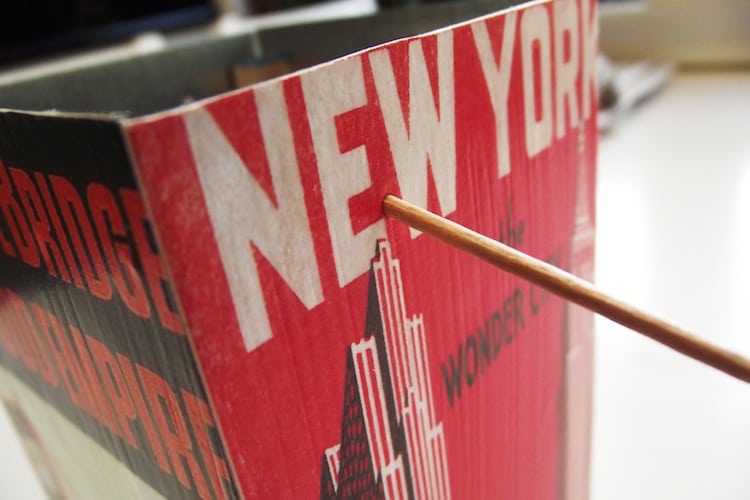
- Apply decorative paper or printed images to the metal plates using Mod Podge Matte. Allow to dry completely, then brush on a sealing coat of Mod Podge. Trim away excess paper.
- Using a toothpick, carefully poke through the paper anywhere it covers the existing holes in the galvanized plates. Gently widen the openings so light can pass through.
- Place battery-operated tea lights inside each luminary. A tea candle look is perfect for creating ambiance, though battery-operated tea lights are the safest choice.
Notes
- In this case I realized that I could have used the screw trick from step six when I attached the dowels. Just apply the glue, lay the metal down and screw it into place until it dries. Much simpler.
- Also I realized that I should have painted the insides as it wasn’t too attractive when all was said and done. Since it was too late to paint, I instead cut a square of Plexiglas the same size as my base, hand sanded one side of it to make it opaque and dropped it in the top of the luminary. It looks great and gives it a nice, finished look.
- If you’ve got a drill press you can drill even more holes through the sides to create more light.
I hope you enjoyed making a luminary and that it sparks your creative fire. Feel free, as always, to ask questions – I will monitor the comments section. I’d also love for you to visit these other related posts:
Confetti Candle Holders • Decorate Flameless Candles • DIY Votives • Frosted Luminaries • Halloween Luminaries • Mason Jar Candle Holders • Mason Jar Crafts • Paper Wrapped Candles


really great idea, and one could even leave a panel or two without the images for a more industrial look…..
thanks so much for sharing on craft Schooling sunday!
Love this!