
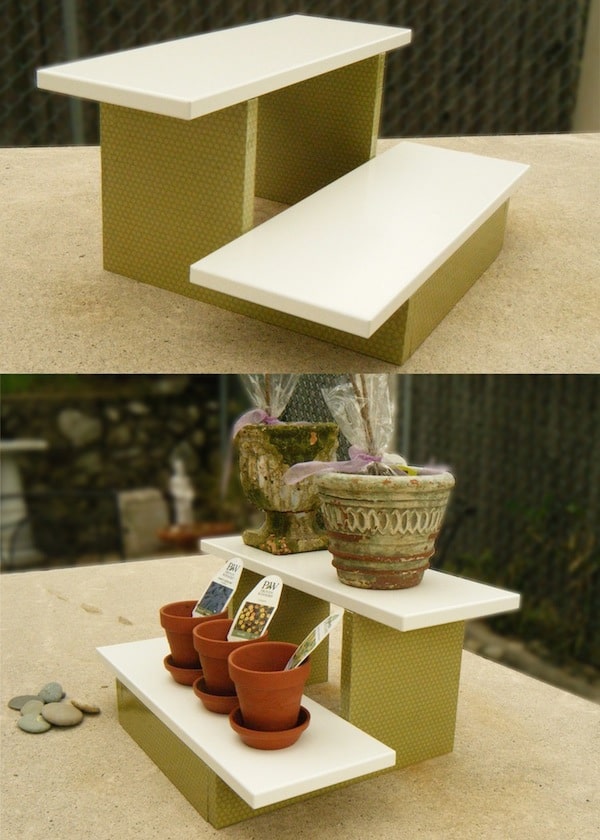
What I love about this DIY wood plant stand is that you can use it at size to grow small items in a small space (like herbs/spices in your apartment)!
If you went on vacation and haven’t been keeping up with my Man Podge series, then you are in for a treat! I’ve got two gentleman (gentlepodgers I should say) giving you the “man’s perspective” of Mod Podge on a weekly basis.
They are Walter Silva and David Cheney – both unique, both highly talented! Up this week is Mod Podge Walter with a mini wood plant stand.
What I love about this project is that you can use it at size to grow small items in a small space (like herbs/spices in your apartment) or you can make it larger to fill a bigger space.
As you know, Mod Podge Command Central is not large, so this is the perfect size for an indoor garden. Read further for Walter’s awesome tutorial.
DIY Wood Plant Stand
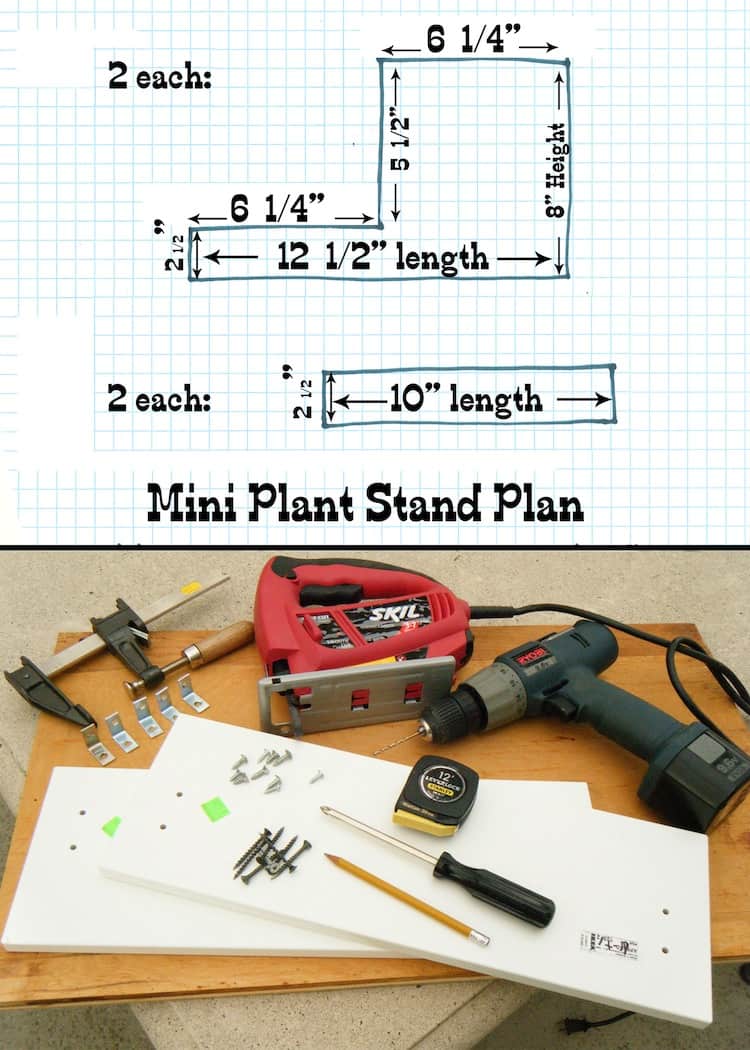
This is what you will need to complete the project:
- Mod Podge (Outdoor is recommended)
- Scrapbook paper
- Wood cut according to the diagram image above (see notes below!)
- 5 – 6 “L” brackets with screws
- 8 wood screws
- Tape measure
- Pencil
- Paintbrushes
- Sanding block (100-grit)
- Multi-surface or Outdoor acrylic paint
Tools
- Jig saw
- Power drill
- Table saw
- Clamp
- Screwdriver
Notes on wood: I purchased two white kitchen drawer fronts from the As-Is section of IKEA, sized 6 1/4″W x 18″L. These drawer fronts had a solid, baked-on finish. That’s how I decided that these would be my top steps.
SO – you’re going to need two pieces of 6 1/4″ x 18″ wood (you can use plywood) in addition to the pieces in the diagram photo. IF you use plain plywood, you’ll want to paint it with an outdoor or multi-surface paint.
That’s why I have acrylic paint as optional in the supplies list. Paint your plywood with a few coats and let dry.
Of course if you happen to find drawer fronts or something similar that you’d like to use, just alter your plant stand measurements to fit if necessary.
Step One
Assemble your tools and cut the wood as listed above using a table saw. On the two larger pieces, cut them as a rectangle – you’re going to use the jigsaw in step two to cut out the indentions.
If you don’t have access to a table saw, a home improvement center may cut them for a small fee. Remember to always measure twice and cut once.
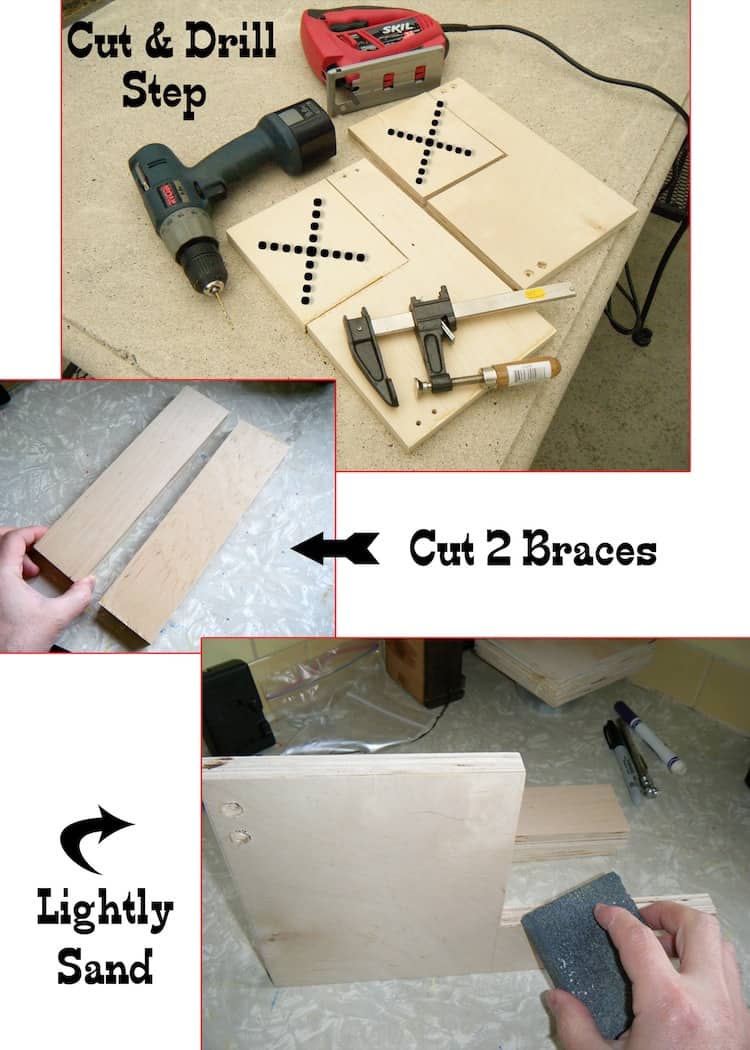
Step Two
You’re going to use the jigsaw on the two larger pieces of wood. Clamp down the sides and cut out a section (5 1/2″ x 6 1/4″) with a jig saw. Repeat with the second piece of wood.
Lightly sand everything you just cut to make the edges smooth. I used a 100-grit sanding block.
Step Three
Pre-drill the holes for the support pieces. Choose the drill bit that matches your screw size (
Then pre-drill the holes with a drill @ about 1″ from the top and another 1 ” from your 1st drilled hole. This step is done!
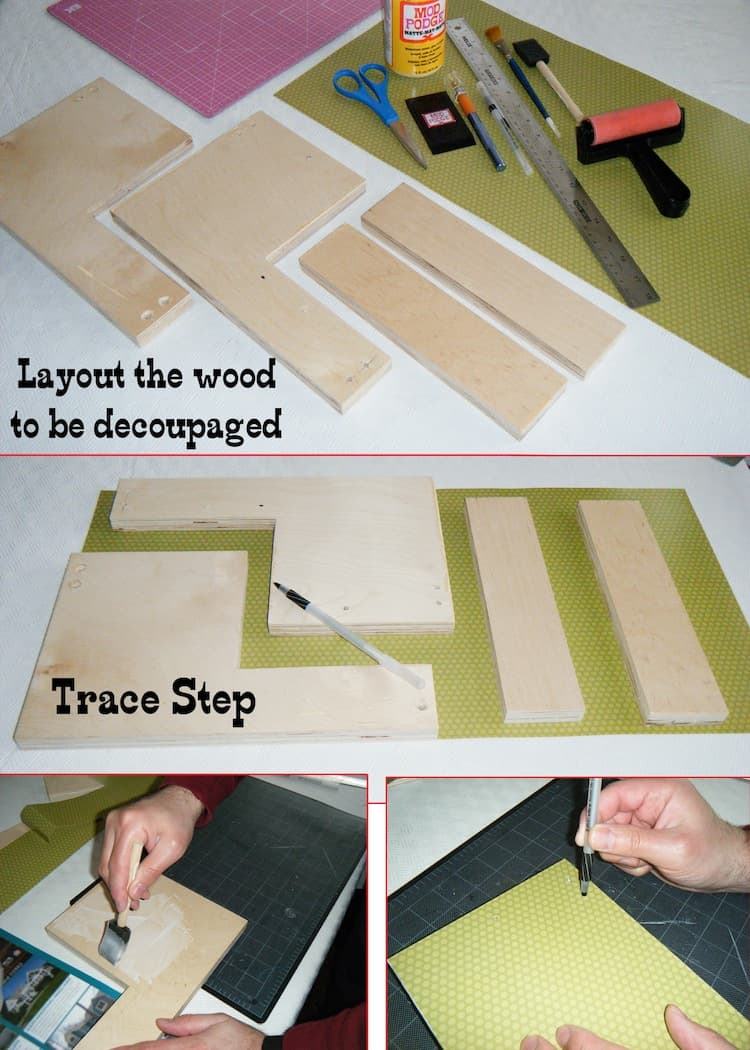
Step Four
Lay out the wood pieces onto scrapbook paper and trace. Cut out all of your scrapbook paper – I even cut 3/4″ strips for the thickness of the plywood (to cover it)! I’ll let you decide if you want to go that far.
Now you’re ready to decoupage your wood plant stand. I applied a generous coat of Mod Podge to the wood and paper and then used a Mod Podge Brayer to smooth out the paper. Wipe off any excess Mod Podge. Let dry; you’ll wait to give it a top coat.
Tip: I used the pen tip to puncture the paper where the pre-drilled holes were before the paper dried.
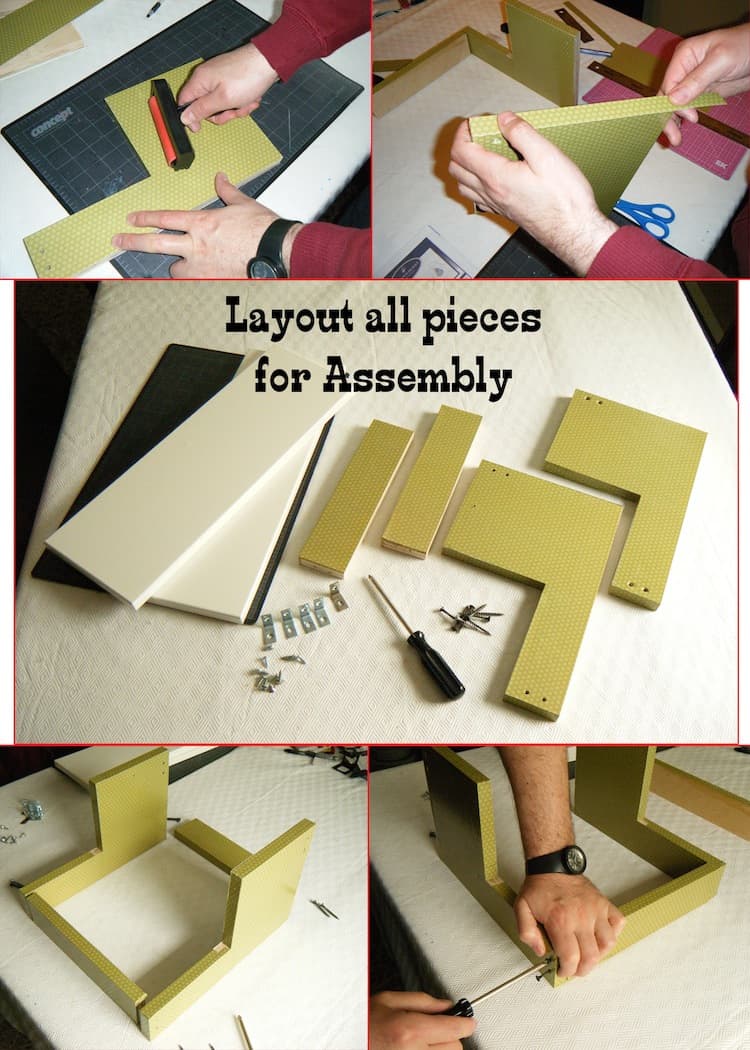
Step Five
For this step you want to layout all the decoupaged pieces, 5 “L” brackets, screws, and screwdriver.
First I did a dry fit to make sure it all worked together after decoupage. Then I used my wood screws to attach each side to the braces.
One brace went across the front/bottom, and the other went across the back/top.
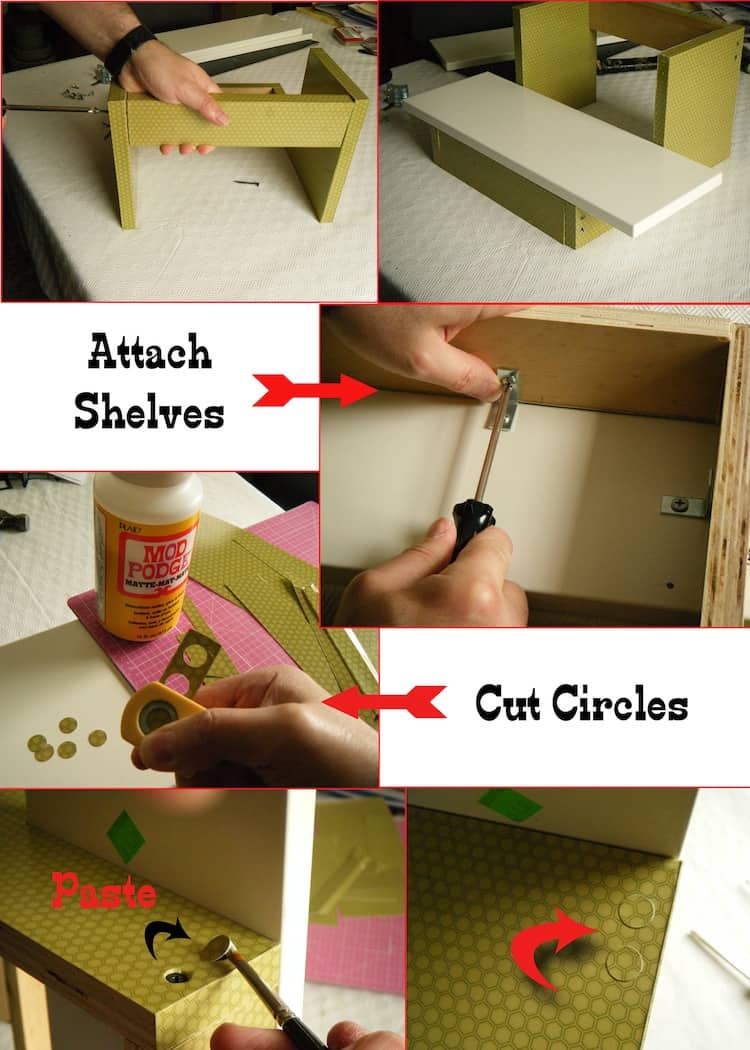
Step Six
Attach one of the IKEA drawer fronts (or plywood, or whatever you are using) to the bottom step. Turn the plant stand over and place three “L” brackets, one on each side (left & right) and one in the middle. Make pilot holes with your drill and screw in the “L” brackets.
Repeat this step for the top step. I only used two “L” brackets for the top step and it was sturdy enough.
Tip: Use a small punch to make little circles from the paper that you use to cover the base. Decoupage the circles over the screw heads to cover them. Let dry.
Step Seven
Cover your entire plant stand with a coat of Outdoor Mod Podge. Let dry and then repeat. If you plan to expose your plant stand to water (like it might sit outside), then use a brush-on sealer in addition.
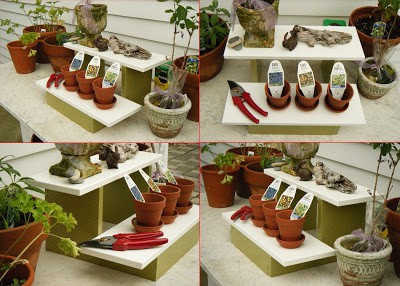
This DIY wood plant stand was made for under $10.00 and with mostly recycled materials lying around the house.
I’m wondering what you can make it from and how little you can make it for! Let me know in the comments.


I like the detail of covering the screw heads with paper.
Nice work and wow!
Now I know what to do with the scrap pieces from building a garage. I keep staring at them wondering and woot, you helped.
Thanks for sharing.
This is such a neat and simple project. I can see all sorts of decorating possibilities.