
DIY screen printing doesn’t have to be expensive! Do it with Mod Podge – you won’t believe how easy it is and how good it looks. Scroll down to see a video of the process in action . . . with two bonus techniques as well!
Skills Required: Beginner. If you’re doing a simple design, you don’t really need any prior crafting skills. Just work slowly if you haven’t crafted before.
I finally did it! I tried DIY screen printing with Mod Podge. I’ve talked about this before, always wanted to do it, and I finally did. Let’s not talk about the fact that I want to use wallpaper with Mod Podge too and haven’t done it yet – no, let’s not even go there.
Homemade Screen Printing
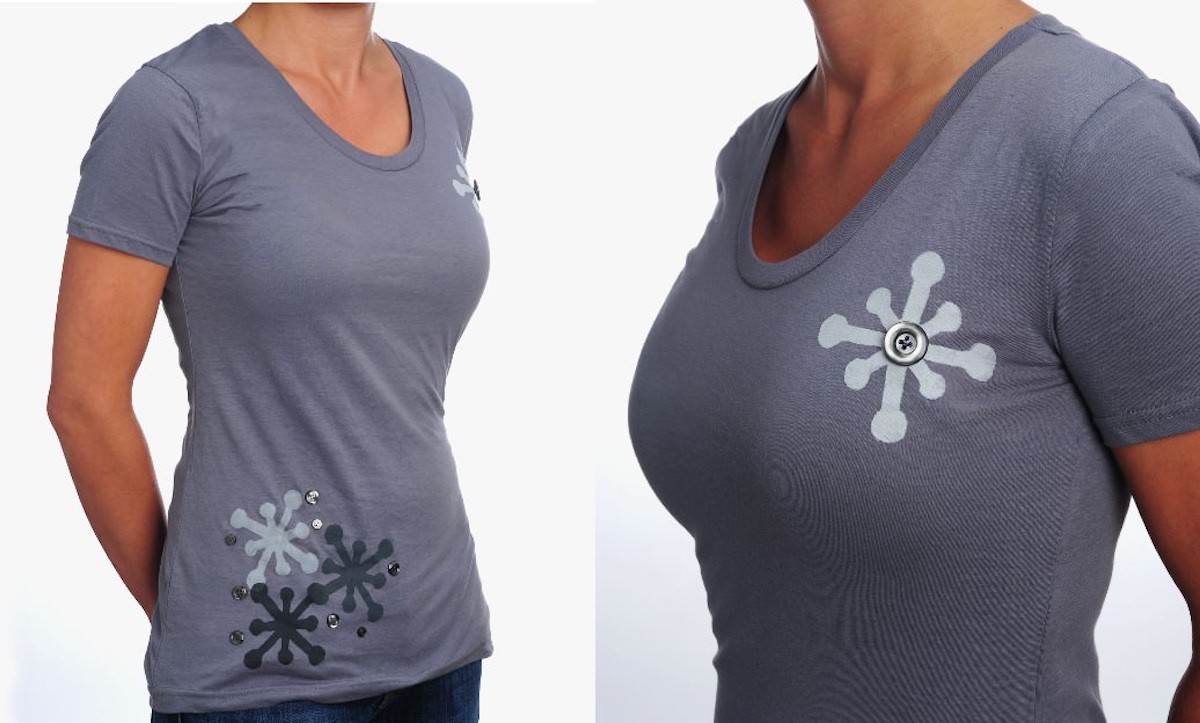
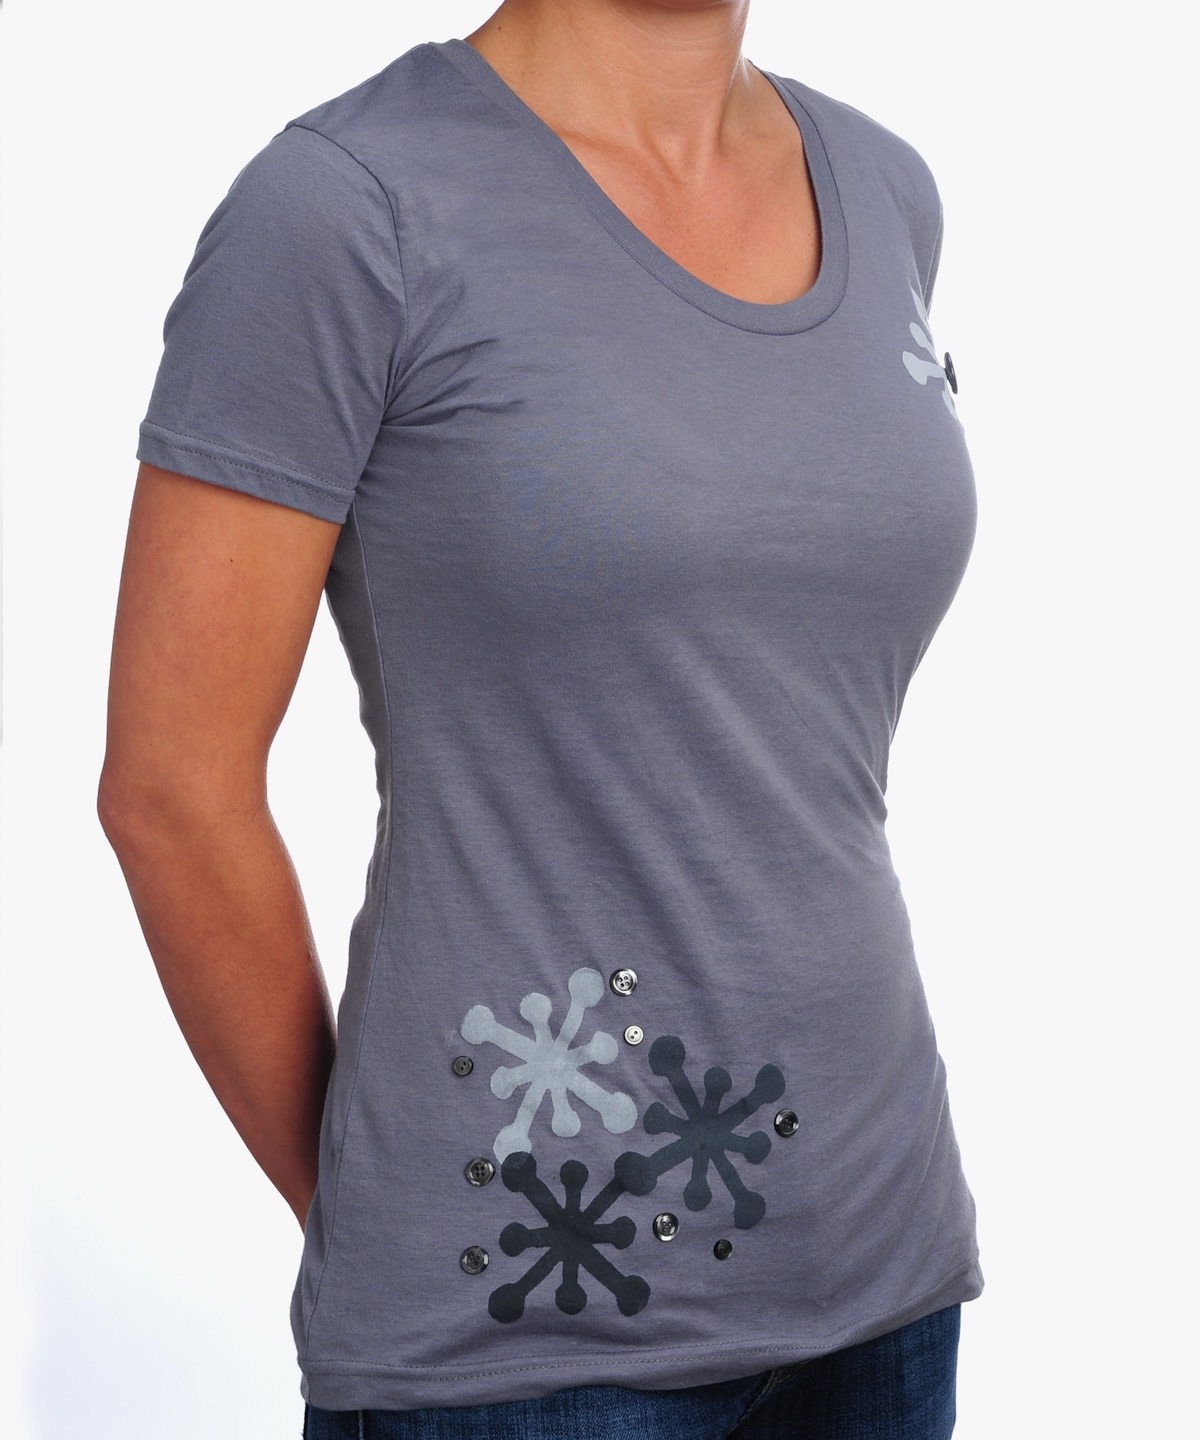
I’m so pleased with the results of my fashion craft that I bring you this DIY screen printing tutorial. I’ll start with something easy and then tell you about my shirt above.
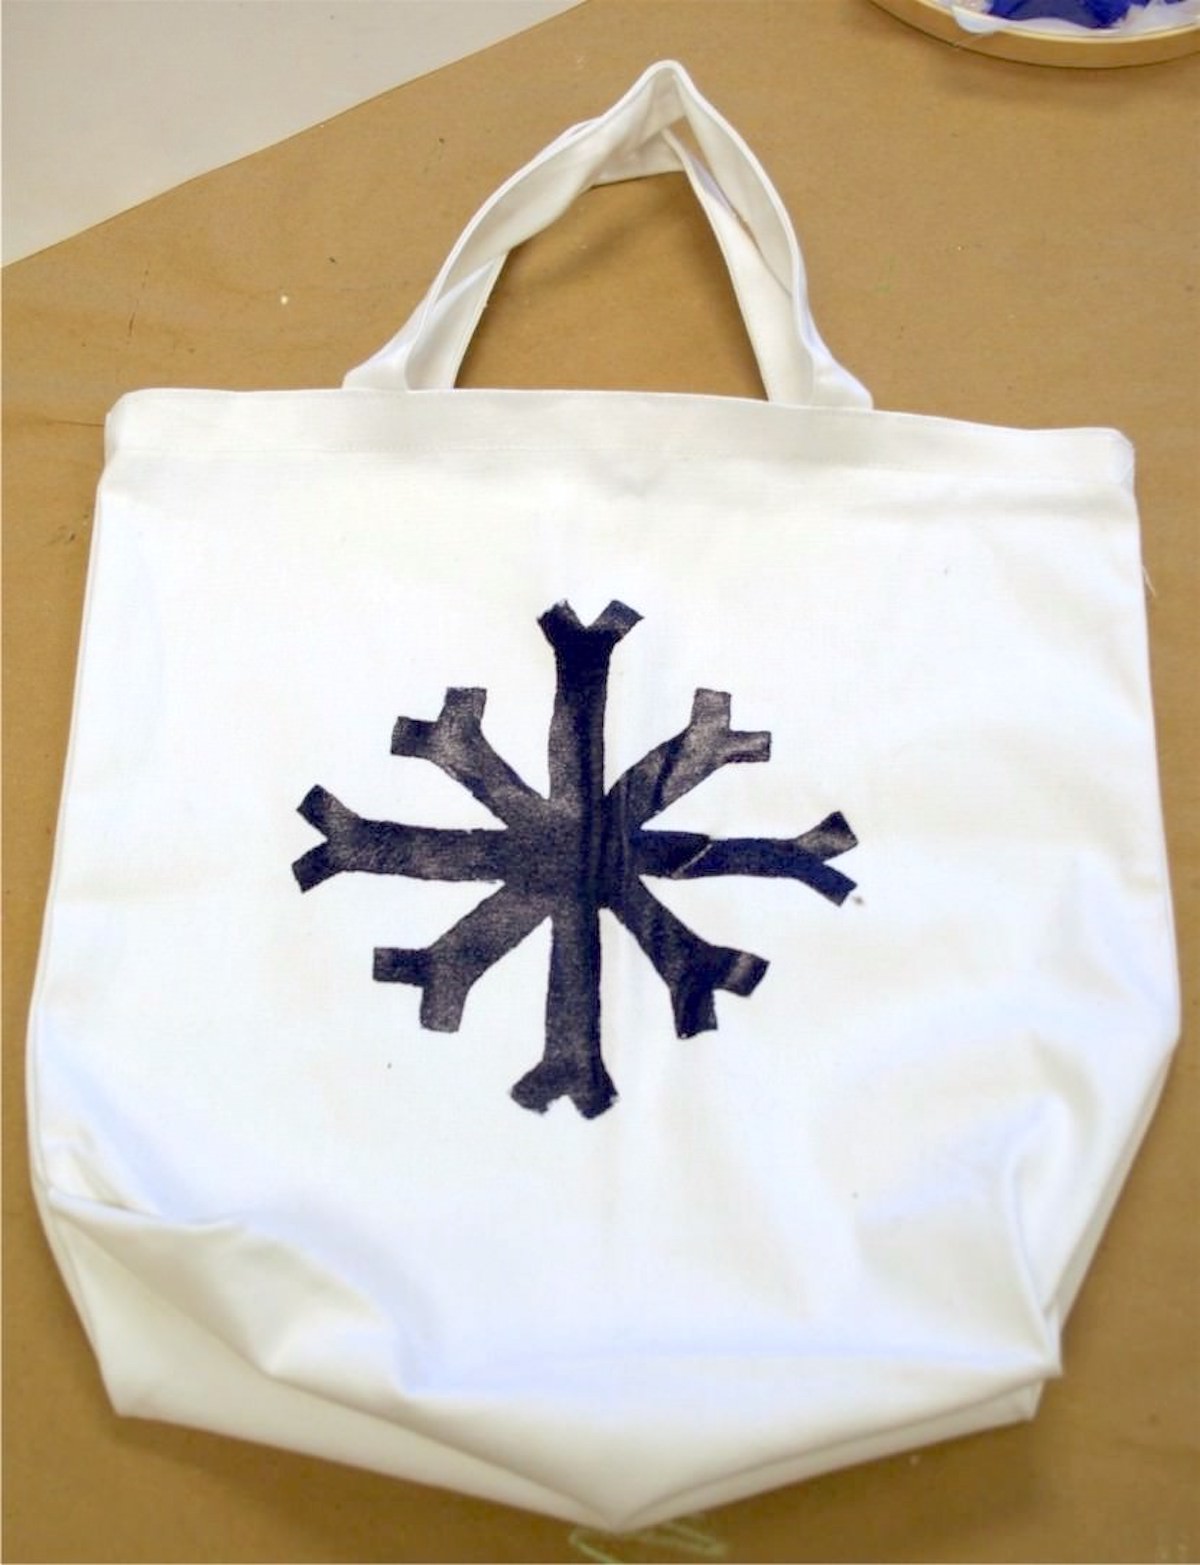
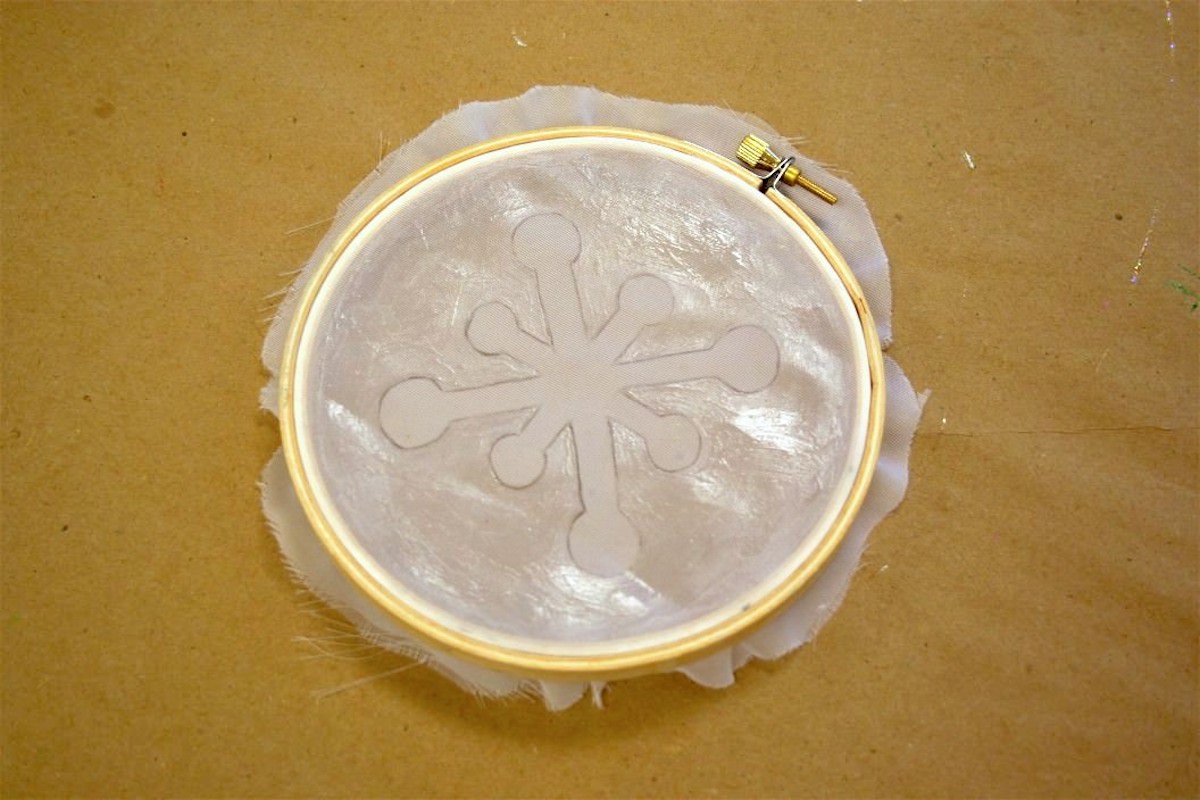
Here’s my first try, the snowflake tote:
Before I show you how it’s done, I wanted to go over a few commonly asked questions I’ve gotten about this project. It’s a really easy craft, but there are some things to know.
DIY Screen Print vs. DIY Silk Screen
Essentially the two techniques are the same. “Silk screen” is traditionally called that because silk is used in the process. The panel I used in this process is polyester, but you might be able to use silk.
I was just looking for something with fine holes that seemed reasonable for a DIY silk screen or screen print and the panel I found worked well.
NO Emulsion, NO Sensitizer
The awesome thing about this tutorial is that you don’t need any emulsion or any sensitizer. I love that you don’t need any chemicals! You still get the crisp lines as well. It’s pretty awesome.
Mass Production
You can do several t-shirts with this method – you can reuse the screen. You might have to touch up the Mod Podge in some places depending on how many times you used it/how thick you applied it.
But if you are making shirts for a summer vacation (for example), you’ll be able to produce your t-shirts using one screen just fine. If you’re planning on mass-producing t-shirts, I’d go with a different method.
Are you ready to learn how to print on shirts and other goodies with my technique? Here’s what I pulled together.
- Embroidery hoop – doesn’t matter if it’s wood or plastic
- Sheer curtain panel – I got mine for $1 at the dollar store (I’ve also heard IKEA is good source)
- Screen printing ink – any kind or colors, Speedball is great
- Fabric Mod Podge
- Flat paint brush
- Sheet of paper, any kind
- Pencil
- Cotton bag
- Scissors
Once I did the bag I was more confident, so I created this mini snowflake screen in the same way that I did the large snowflake one for the bag.
I grabbed a gray t-shirt and mixed together some black and white screen printing ink, then followed the steps I listed above. You’ll notice I did several shades on the t-shirt.
Gray tonal makes me happy, so printed one snowflake, then added more white. Then did it again. And again. And one more time. Finished t-shirt!
Get the printable how to and try this yourself below:

How to Screen Print at Home
Equipment
- Paintbrush(es) flat
Materials
- Embroidery hoop
- Sheer curtain panel
- Surface – t-shirt or cotton bag
- Screen printing ink
- Mod Podge Fabric
- Sheet of paper any kind
Video
Instructions
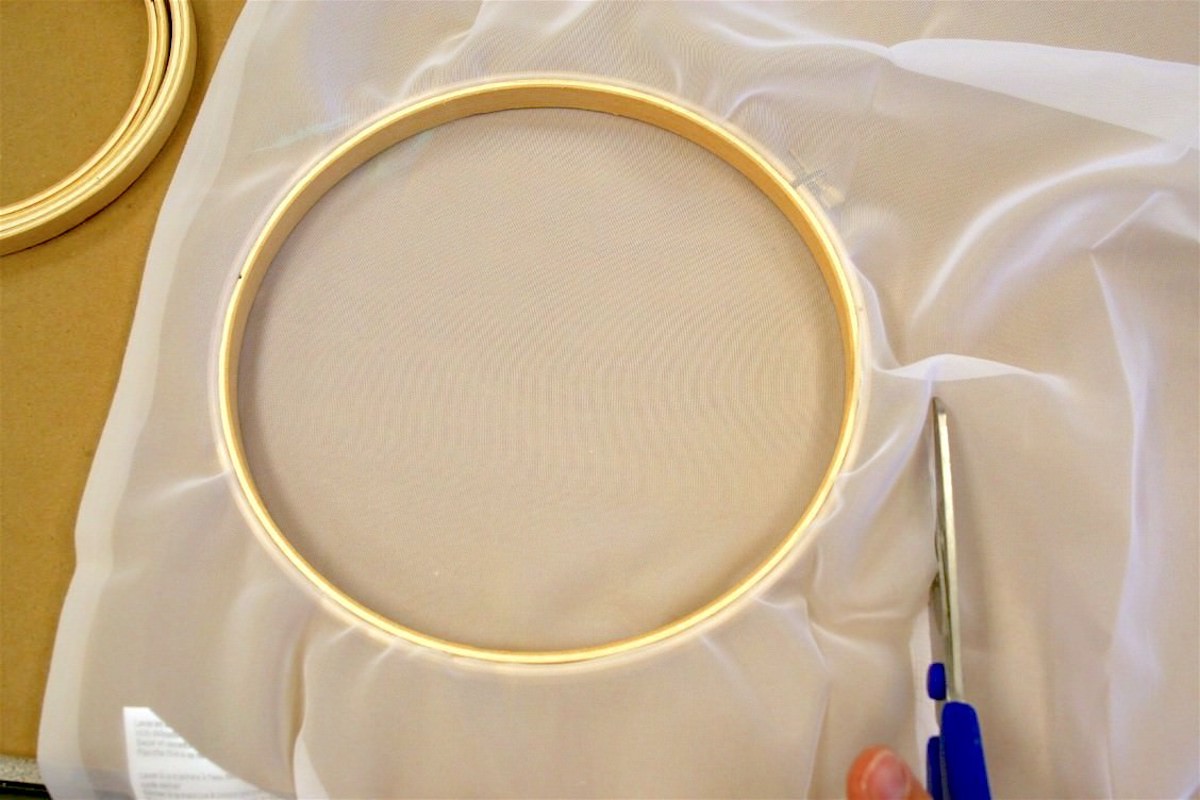
- Fasten the curtain panel into the embroidery hoop. Screw the hoop closed and pull the curtain tight, tight, tight.
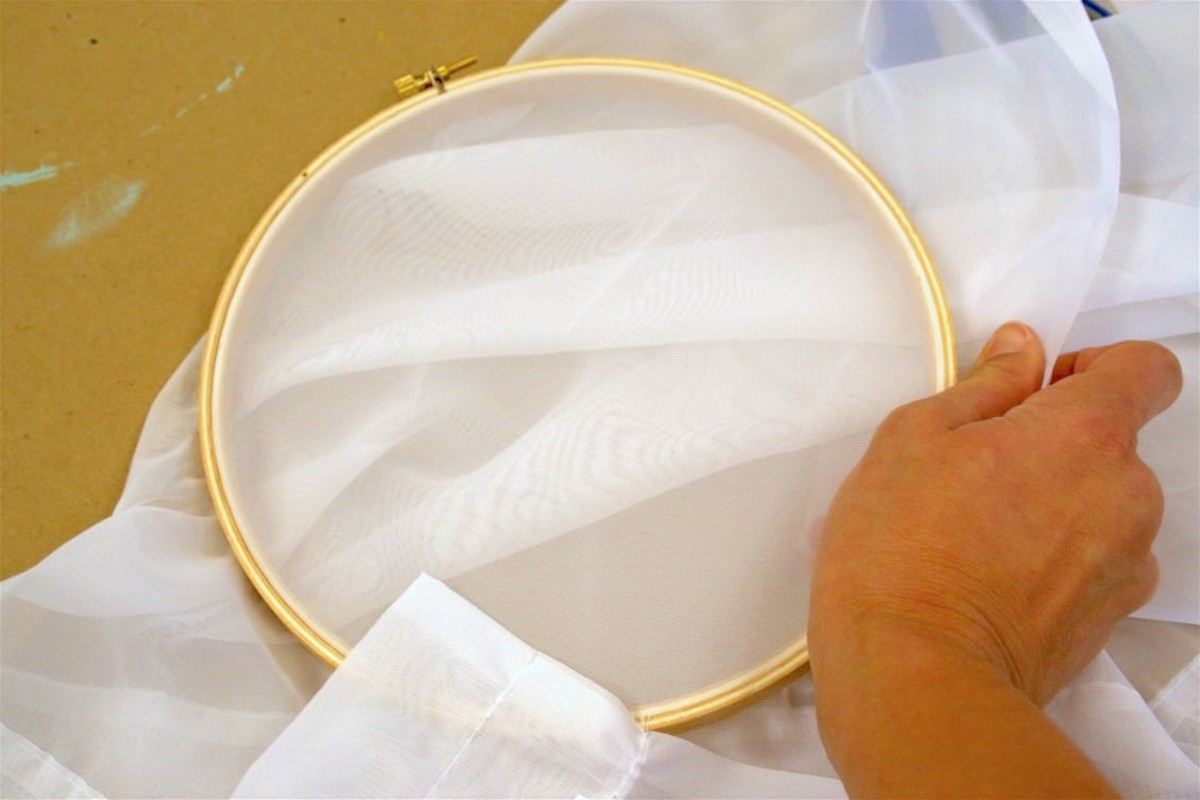
- Turn the hoop over and cut the excess curtain material around the frame. Put the extra curtain aside and pull the screen taut again.
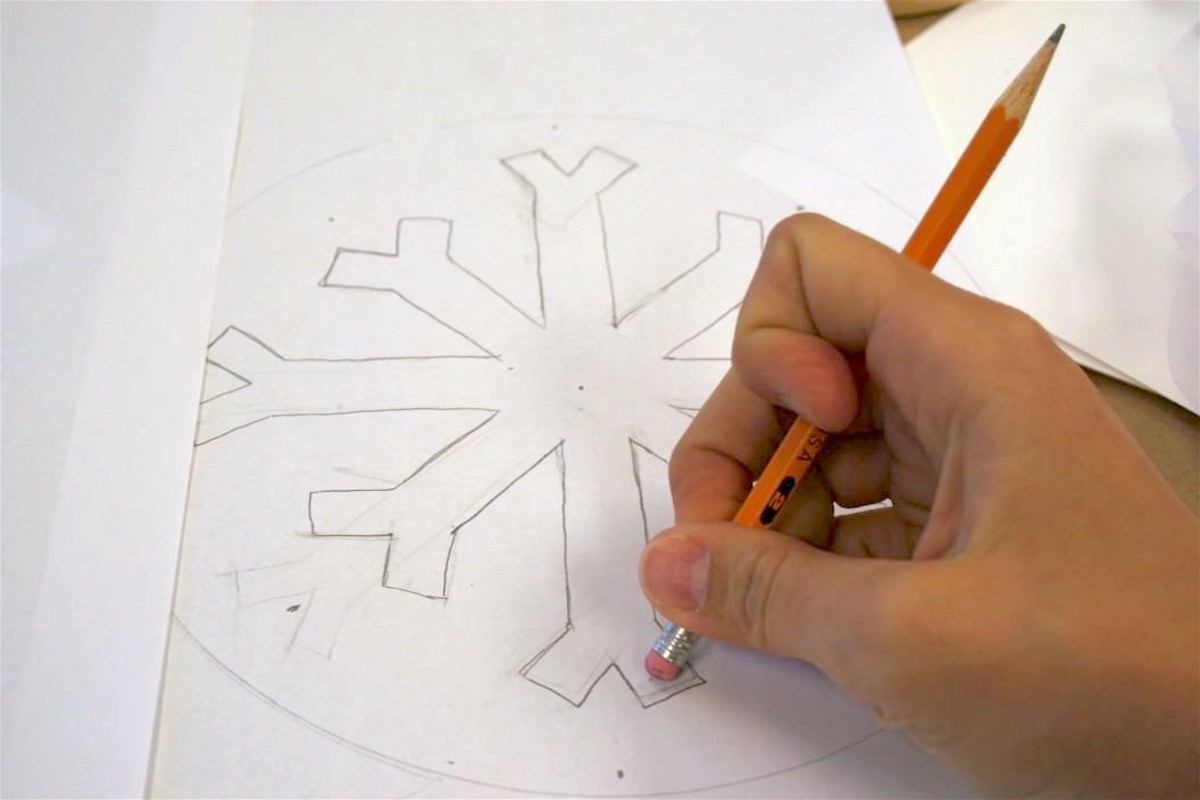
- Print out or hand draw an image that you will screen print. Keep it relatively simple for your first design.
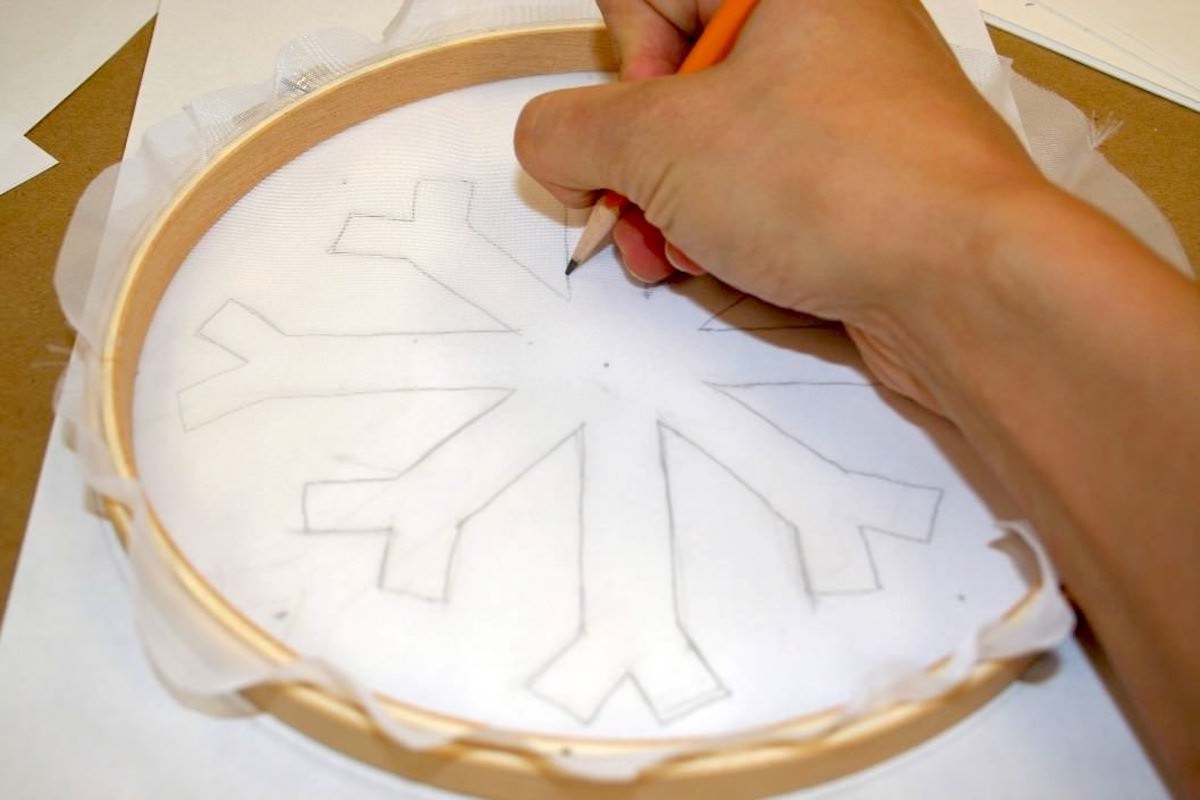
- Place the screen down onto the design. Trace directly onto the screen with a pencil.
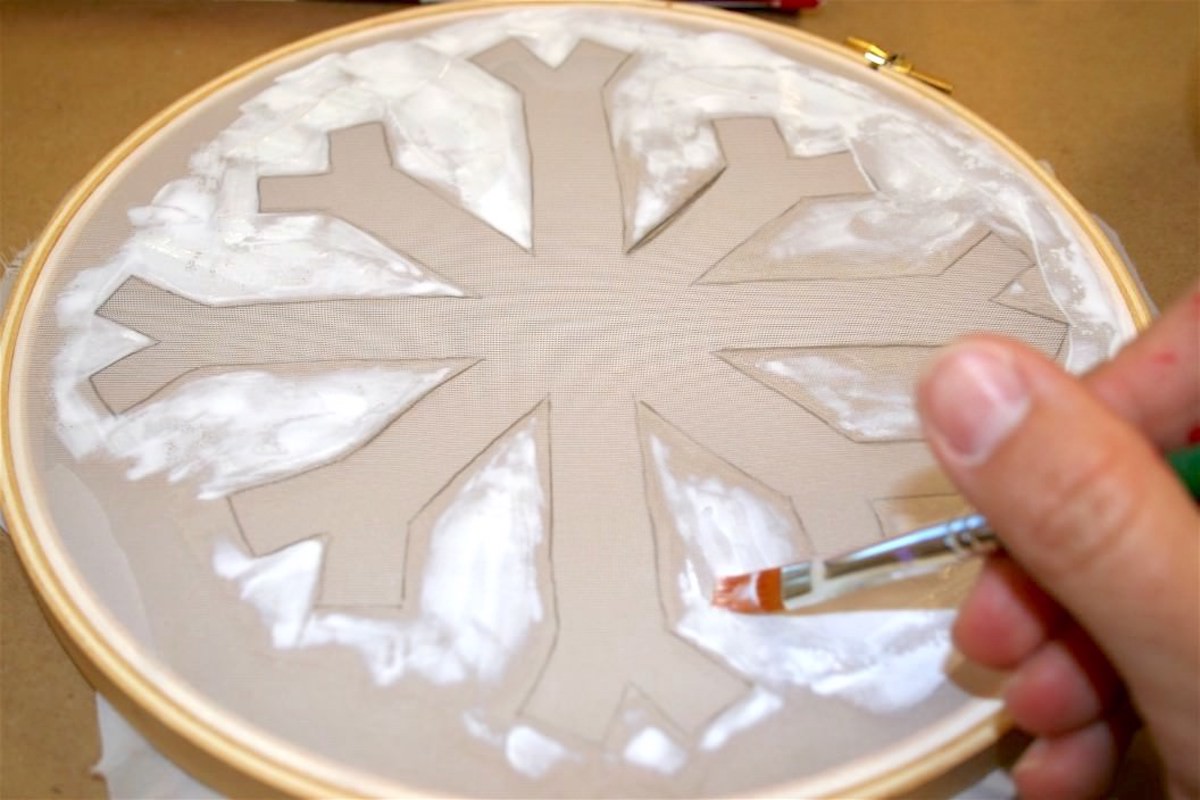
- Using a paintbrush, paint Mod Podge on the screen where you DON’T want the ink to go through. This is called the “resist” because it resists the ink coming through the screen.
- Let the screen dry for a few hours until it’s completely clear. Apply an additional layer of Mod Podge and let dry.
- Place the screen down on the surface and paint. Tip: place something between the layers of fabric, so that the ink doesn’t bleed through. Be sure to get the corners well.

- Pull the screen off. Touch up any areas that need it with ink and a detail brush. Allow to dry for 24 hours. Follow the directions on the packaging of your screen print ink to finish your project (wash or heat seal, etc.).
Notes
If you enjoyed this project, let me know in the comments. I’d also love for you to check out the following projects:


You’re using normal midge lodge I. The photo…
You can use normal Mod Podge too. The Fabric Mod Podge lasts longer on the screen though. Thanks for pointing that out b/c you can definitely use the original as well!
Used this hack to make a checkerboard pattern on a screen. I taped off the pattern with painters tape and dabbed the glue on the negative spaces. The results were crisp lines and a screen I can use forever! Thank so much for the tip!!
WOOT! Glad it worked!
Legend thankyou for this post! Its exactly what I’ve been looking for! My brain had been looking for a simpler and less expensive way to do it! Thankyou!
Pleasure!
Interesting ideas i used in 1988 through year 2000
Can you clean and reuse this screen print in the future?
Hi G – Yes, you can! Though you might have to touch up the Mod Podge in some places depending on how many times you used it/how thick you applied it.