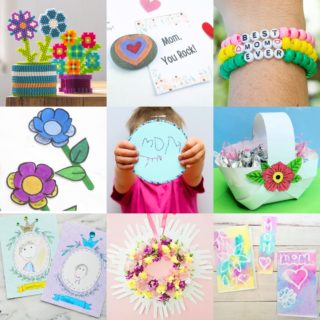
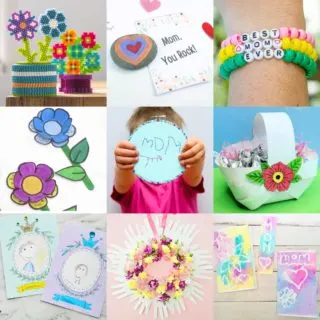
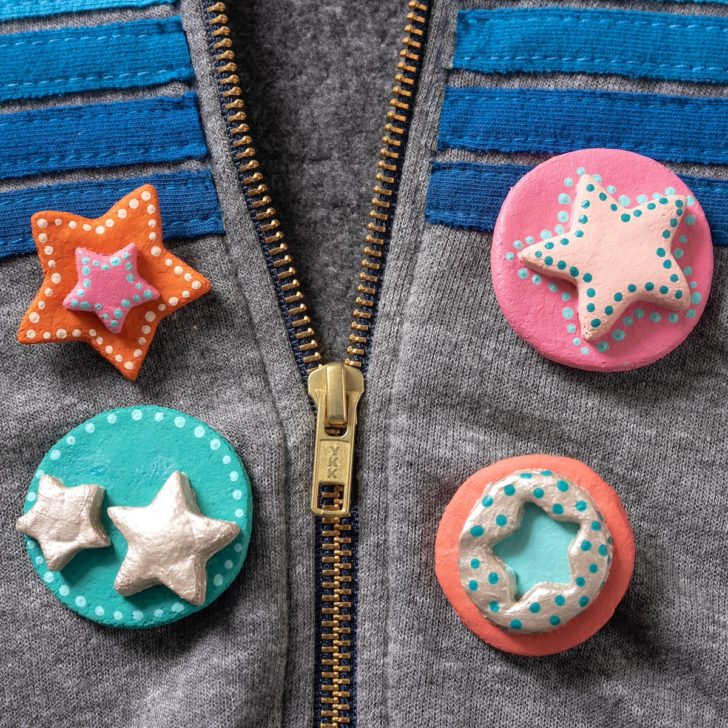
Sunday, May 27, 2012

DIY handstamped coasters.

Sandra is brilliant - she discovered that you can stamp on porous tiles, and if you let the ink dry before Mod Podging, you can complete the project without any smearing. I like it when people are smarter than me and figure things out! If you need a great gift idea, this is a great budget project as well. Visit Sandra to see how they were made.

DIY handstamped tile coasters at The White Library

PS - The Mod Podge Rocks book is out, and I wanted to direct you to some lovely folks who have a review and/or giveaway on their site. A big "thank you" to them, my friends, for their support! Take a peek at their sites, and a few have great giveaways including huge prize packs (with Mod Podge).

Always in Wonder
Blue Cricket Design
Dollar Store Crafts
I Am Momma Hear Me Roar
Little Birdie Secrets
Margo Potter
Sand and Sisal
Saved By Love Creations
Sweet Rose Studio

Saturday, May 26, 2012

Bright and cheery birdhouses.

I've always loved the little $1 birdhouses you can get a craft stores - and I think it's a fun idea to make a display with them. Fonda's caught my eye . . . and why do you think? Hello stripes, polka dots and the color blue! I love the way she put them on pedestals and made a mantle display out of her collection, and it would be so cute for spring/summer. I'll let you visit her blog to see some of the others.

Mini painted birdhouses at Southern Scraps

Calculator gift for teacher appreciation.

I spotted this calculator gift from Positively Splendid at Cindy's teacher appreciation series and I thought it was so sweet. It also helps that the calculator itself is such a lovely color of aqua, AND that Amy Mod Podged fun paper to the back to personalize it. You could give this as a teacher's gift, but also to anyone who likes to calculate (which I do from time to time). Visit Cindy for Amy's tutorial.

Personalized calculator gift with free download at Skip to My Lou

Friday, May 25, 2012

Mod Podged garden caddie.

Are you interested in learning how to transfer an image with Mod Podge? And are you getting ready for summer parties? You are in luck - I found a project that will teach you how to transfer as well as be perfect for warm-weather shindigs. You can use it as a garden caddy as well, but I really like the mason jars and silverware display above. The graphic is from Graphics Fairy, and the caddy was a thrift store find. To learn how to make it, visit the tutorial below.

She's using Mod Podge again at Creative Carmella

Mod Podge fabric covered books.

Erin Bassett is a crafter and artist that you should definitely know about. Her mixed media is so pretty, and she's a great teacher as well. I'm thrilled that she was featured in my new book (she's got her PhD in Mod Podge). I'm also lucky to have her guest posting these beautiful book covers!

--------------
Hi everyone! I'm Erin Bassett and I'm going to share with you a quick project that will really spiff up your home. I love to use books around my home as part of the decor. It's a great way to add visual interest and sometimes give a favorite item a boost in its height. My only problem is that the book covers don't aways "go" with my decor . . . so here's a great way to change it.

Just grab some books, Mod Podge (I used a matte finish), fabric, scissors, brayer, and an old hotel room key (or even a piece of cardboard will do), and some paper towels to clean up any excess.

For projects like this I like to put some Mod Podge into a squeezable container so that it's easier to control and I'm less likely to dump out too much. You can see that I'm not really a "clean" crafter and I already made a mess just transferring it . . . but I'm sure you'll be much neater about it. ;)

Start off by squirting out some Mod Podge all over one side of your book. Next use the hotel key to spread it all over. Make sure that you cover it completely, especially the grove near the spine.

Then apply the fabric, smoothing it out with your hands and the brayer. If you happen to see that it's not sticking well somewhere, you can add a bit more Mod Podge under the fabric and smooth it down again. When you're done with one side, flip it over and do the spine and the other side.

Next, open the book up. Cut small slits near the spine and trim down the spine piece.

Then you're ready to adhere the "flaps" down to the inside covers. Since I am using these as decor, I'm not too worried about what it's going to look like on the inside, so I just glued them down with Mod Podge. If that's going to bother you then you can always cover up the inside cover with another piece of fabric after you glue down the flaps.

For the corners, I just folded them like I was gift wrapping a box and made sure that they had plenty of Mod Podge in the layers of the fabric.

After the edges are adhered, apply some Mod Podge to the spine piece and tuck it down in the spine . . . you may have to use tweezers or some sort of tool to get it down there if it's tight. And that's it!!


They are really quick to make and they don't take too much time to dry either. Go grab those books you have just laying around and get them covered!!


Erin Bassett writes the blog creativitE and considers it a blessing to be able to call her passion "work." She has been published in many books and magazines including Mod Podge Rocks!: Decoupage Your World. Erin is a craft addict who loves to do something creative every day. Her current loves are mixed media art, scrapbooking, papercrafts, sewing, and screen printing.  Follow her on Twitter, Facebook and Pinterest.

Follow Me on Pinterest

Thursday, May 24, 2012

Staree - monetizing social media.

This post brought to you by IZEA. All opinions are 100% mine.

I'm always interested in new social media tools. I'm "one of those people" who likes to try the latest and greatest application to see if it's fun, and I inevitably get hooked! Recently IZEA (makers of SocialSpark.com) launched a new app called Staree, a photo and video sharing service. I work with IZEA a lot and love what they do, so was excited to give it a go. It's also interesting because Staree can monetize your content. Even if you don't blog, you can make money from using social media and sharing your content. Interesting, huh?

It's easy to get started.

1) go to Staree.com and create an account, either through Twitter or Facebook. As you can see, I have a profile page. Wow, my face is big.
2) load photos and video onto Staree (you can also post on your mobile phone).
3) share on Twitter and Facebook.
4) earn money! If you take great pics Staree team members will reach out to you with special offers from advertisers to take pictures with their products.

I chose to upload this old picture of me at work because I'm quite sure that it will get lots of hits and I will be rich. Seriously though, if you are interested in monetizing social media, it's worth checking out!

staree_user_interface_earnings


Visit Sponsor's Site

Updated dinner tray.

I don't know if you remember the TV tray revamp from not so very long ago? Well, I have another treat for you! Kim upcycled one herself, and you'll be impressed to see what a little scrapbook paper and clear coat can do. I love that she said she no longer has to be embarrassed and quickly put it away when guests come over. We've all had "those" pieces of furniture. Hahaha! Please visit Kim to see her lovely revamp.

Fabulously updated dinner tray at Seven thirty three

Fancy octopus table.

Hi all!! My name is Janel and I hide behind my blog Hating Martha . . . and Mustaches. I blog about DIY, crafting, recipes, and all sorts of fun things!

Stop by and say hi sometime. I love ModPodge! It is so useful in crafting and decorating. And I am so excited to be here! Here's an example of one of the great uses of Mod Podge…

See this sad, broken end table . . . some paint, old books, printed Octopus, and . . . Mod Podge turned it into this:

1. fix the table leg. Done!

2. Paint the table. I used a gorgeous sea blue. And in all honesty, I used spray paint. I know. But, it’s so easy!

3. Find an old dictionary and take out some of the pages.

4. Lather Mod Podge all over the top of the table. Watch that it doesn’t drip along the side.

5. Carefully place your pages on the top. Move quickly, making sure the pages are facing the direction you want and that they are only sticking to the top (not along the sides).

6. Carefully cut the ends of the pages off (I used a sharp craft knife).
7. Cover the top with Mod Podge.

8. Print out the Octopus of choice ( I found a black and white and printed it to several pages for a larger size) and cut it out.

9. Mod Podge the octopus to the top of the table. Watch that you have it placed properly.

10. After the Mod Podge has dried…”age” the table by brushing wood stain on and then rubbing it off. If desired…finish with a coat of Polyurethane and edge the top with hotglue and rope.

Thanks for having me and letting me play with Mod Podge! Come over and visit me at Hating Martha when you get two minutes!!

Follow Me on Pinterest

Wednesday, May 23, 2012

How to make a cardboard canvas.

Alma always impresses me because she is sooo creative. Artistic, really. I am one of those creative non-artist types. Haha! Seriously though, I am, and I love reading Alma's blog posts because they take me into that artistic place, where I want to try new and .  . . artistic . . . things. In her most recent Mod Podge post she made canvases from a cardboard cereal box and book pages. Then she painted on top of them, and now they are beautiful. You should visit her to see how she made them.

How to make cardboard canvas at Alma Stoller